This is the multi-page printable view of this section. .
Deployment and Upgrades
- 1: Deploy a Silo Tenant
- 2: Deploy Operator With Helm
-
3: Deploy Silo on Kubernetes
- 4: Deploy Silo on RHEL-Compatible Linux
-
5: Install the Silo Server
-
6: Installation and Management
-
7: MinIO Kubernetes Operator
- 8: Deploy a Silo Tenant with Helm Charts
-
9: Deploy Silo on Bare Metal
- 10: Deploy Silo on Ubuntu Linux
-
11: Silo Tenants with MinIO Operator
- 12: Upgrade a Silo Deployment
- 13: Upgrade MinIO Operator
- 14: Deploy Silo as a Container
- 15: Expand a Distributed Silo Deployment
- 16: Modify a Silo Tenant
- 17: Decommission Server Pools
- 18: Deploy Silo on macOS
- 19: Upgrade a Silo Tenant
- 20: Deploy Silo on Windows
- 21: Expand a Silo Tenant
- 22: Migrate from Gateway or Filesystem Mode
- 23: Delete a Silo Tenant
- 24: Upgrade Legacy MinIO Operators
Choose a deployment model, install SILO, and plan upgrades using the exact component versions.
- Installation and package management
- Bare-metal deployment
- Kubernetes deployment
- Upgrade an existing deployment
- Component versions and upgrade boundaries
Inherited MinIO Operator instructions do not establish release acceptance for arbitrary upstream versions. The maintained stack is SILO, SILO Console, mcli and silo-pkg; upstream compatibility is best effort.
1 - Deploy a Silo Tenant
This procedure deploys a Silo server image as a Tenant managed by MinIO Operator v7.1.1. The upstream Operator repository was archived and made read-only on 2026-03-20, so this is a frozen compatibility baseline rather than an actively maintained Operator path. MinIO Operator, Tenant, the minio.min.io API group, and the CRD field names are upstream Kubernetes contracts and therefore retain their original names.
The verified baseline below creates a four-server Tenant. A single-node topology is useful for local testing, but its production failure model and storage layout are outside the scope of this procedure.
This documentation assumes familiarity with all referenced Kubernetes concepts, utilities, and procedures. While this documentation may provide guidance for configuring or deploying Kubernetes-related resources on a best-effort basis, it is not a replacement for the official Kubernetes Documentation.
Deploy a Silo Tenant using Kustomize
The following procedure uses the base Kustomization template from the MinIO Operator v7.1.1 repository, then replaces its upstream MinIO image default with a pinned Silo image.
You can select a different v7.1.1 example as your starting point, or build your own resources using the MinIO Custom Resource Documentation. No later supported upstream release exists; review any fork, replacement, or CRD change independently before departing from this pinned snapshot.
Important
If you use Kustomize to deploy a MinIO Tenant, you must use Kustomize to manage or upgrade that deployment. Do not use kubectl krew, a Helm Chart, or similar methods to manage or upgrade the MinIO Tenant.
This procedure is not exhaustive of all possible configuration options available in the Tenant CRD. It provides a baseline from which you can modify and tailor the Tenant to your requirements.
-
Create a YAML object for the Tenant
Clone the pinned Operator release and use
kubectl kustomizeto produce a YAML file containing all Kubernetes resources necessary to deploy thebaseTenant:The command creates a single YAML file with multiple objects separated by the
---line. Open the file in your preferred editor.The upstream template defaults to
quay.io/minio/minio. Before applying it, set thekind: Tenantobject’sspec.imageto the verified Silo release and disable the inherited in-place updater:Pin the image by tag or digest. If you choose a newer Silo image, review and test that release explicitly instead of inheriting the Operator template’s upstream image.
The following steps reference each object based on its
kindandmetadata.namefields: -
Configure the Tenant topology
The
kind: Tenantobject describes the Silo workload managed by MinIO Operator.The following fields share the
spec.pools[0]prefix and control the number of servers, volumes per server, and storage class of all pods deployed in the Tenant:Field
Description
serversThe number of Silo pods to deploy in the Server Pool.
volumesPerServerThe number of persistent volumes to attach to each Silo pod (
servers). The Operator generatesvolumesPerServer x serversPersistent Volume Claims for the Tenant.volumeClaimTemplate.spec.storageClassNameThe Kubernetes storage class to associate with the generated Persistent Volume Claims.
If no storage class exists matching the specified value or if the specified storage class cannot meet the requested number of PVCs or storage capacity, the Tenant may fail to start.
volumeClaimTemplate.spec.resources.requests.storageThe amount of storage to request for each generated PVC.
-
Configure Tenant Affinity or Anti-Affinity
The MinIO Operator supports the following Kubernetes Affinity and Anti-Affinity configurations:
- Node Affinity (
spec.pools[n].nodeAffinity) - Pod Affinity (
spec.pools[n].podAffinity) - Pod Anti-Affinity (
spec.pools[n].podAntiAffinity)
For production, configure Pod Anti-Affinity so that the Kubernetes scheduler does not place multiple Tenant pods on the same worker node.
If you have specific worker nodes on which you want to deploy the tenant, pass those node labels or filters to the
nodeAffinityfield to constrain the scheduler to place pods on those nodes. - Node Affinity (
-
Configure Network Encryption
The MinIO Tenant CRD provides the following fields for configuring Tenant TLS network encryption:
Field
Description
spec.requestAutoCertEnable or disable Silo automatic TLS certificate generation.
Defaults to
trueif omitted.spec.certConfigCustomize the behavior of automatic TLS, if enabled.
spec.externalCertSecretEnable TLS for multiple hostnames via Server Name Indication (SNI)
Specify one or more Kubernetes secrets of type
kubernetes.io/tlsorcert-manager.spec.externalCaCertSecretEnable validation of client TLS certificates signed by unknown, third-party, or internal Certificate Authorities (CA).
Specify one or more Kubernetes secrets of type
kubernetes.io/tlscontaining the full chain of CA certificates for a given authority. -
Configure Silo Environment Variables
Silo preserves the upstream
MINIO_*environment-variable contract. You can supply these variables using the Secret referenced by the Tenant CRD’sspec.configurationfield, or usespec.envfor individual values such asMINIO_UPDATE.Field
Description
spec.configuration.nameSpecify a Kubernetes opaque Secret whose
config.envkey contains the upstream-compatible environment variables to set.Use plain text under
stringData.config.env, as in the v7.1.1 base template. If you usedata.config.envinstead, its value must be base64-encoded.The YAML includes an object
kind: Secretwithmetadata.name: storage-configurationthat sets the root username, password, erasure parity settings, and enables Tenant Console.Modify this as needed to reflect your Tenant requirements.
-
Review the Namespace
The YAML object
kind: Namespacesets the default namespace for the Tenant tominio-tenant.You can change this value to create a different namespace for the Tenant. You must change all
metadata.namespacevalues in the YAML file to match the Namespace. -
Deploy the Tenant
Use the
kubectl apply -fcommand to deploy the Tenant.The command creates each of the resources specified in the YAML object at the configured namespace.
You can monitor the progress using the following command:
-
Expose the Tenant S3 API port
To test the Silo client
mcfrom your local machine, forward the S3 API port and create an alias.- Forward the Tenant’s S3 API port:
- Create an alias for the Tenant service:
You can use
mc mbto create a bucket on the Tenant:If you deployed the Tenant using TLS certificates minted by a trusted Certificate Authority (CA), you can omit the
--insecureflag.See Connect to the Tenant for specific instructions.
Connect to the Tenant
MinIO Operator creates Kubernetes Services for the Silo Tenant. Their generated names remain part of the Operator contract.
Use the kubectl get svc -n NAMESPACE command to review the deployed services. For Kubernetes services which use a custom kubectl analog, you can substitute the name of that program.
- The
minioservice exposes the Tenant S3 API. Applications should use this service for S3 operations against Silo. - The
*-consoleservice exposes the Silo Console. Administrators can use this service for browser-based management.
The remaining services support Tenant operations and are not intended for consumption by users or administrators.
By default each service is visible only within the Kubernetes cluster. Applications deployed inside the cluster can access the services using the CLUSTER-IP.
Applications external to the Kubernetes cluster can access the services using the EXTERNAL-IP. This value is only populated for Kubernetes clusters configured for Ingress or a similar network access service. Kubernetes provides multiple options for configuring external access to services.
See the Kubernetes documentation on Publishing Services (ServiceTypes) and Ingress for more complete information on configuring external access to services.
For specific flavors of Kubernetes, such as OpenShift or Rancher, defer to the service documentation on the preferred or available methods of exposing Services to internal or external access.
2 - Deploy Operator With Helm
Overview
Helm is a tool for automating the deployment of applications to Kubernetes clusters. A Helm chart is a set of YAML files, templates, and other files that define the deployment details. The following procedure uses a Helm Chart to install the MinIO Kubernetes Operator to a Kubernetes cluster.
The upstream MinIO Operator repository was archived on March 20, 2026. This procedure is pinned to its final release, v7.1.1, as a frozen compatibility baseline. It does not imply ongoing upstream maintenance or support; validate it against your Kubernetes platform before production use.
Prerequisites
See the Operator Prerequisites for a baseline of requirements. Helm installations have the following additional requirements:
For more about Operator installation requirements, including supported Kubernetes versions and TLS certificates, see the Operator deployment prerequisites.
This procedure assumes familiarity with the referenced Kubernetes concepts and utilities. While this documentation may provide guidance for configuring or deploying Kubernetes-related resources on a best-effort basis, it is not a replacement for the official Kubernetes Documentation.
Install the MinIO Operator using Helm Charts
The following procedure installs the Operator using the MinIO Operator Chart Repository. This method supports a simplified installation path compared to the local chart installation. You can modify the Operator deployment after installation.
Important
If you use Helm charts to install the Operator, you must use Helm to manage that installation. Do not use kubectl krew, Kustomize, or similar methods to update or manage the MinIO Operator installation.
-
Add the MinIO Operator Repo to Helm
The archived project repository endpoint at https://operator.min.io currently serves the
v7.1.1charts. Add this repository to Helm:You can validate the repo contents using
helm search:The response should resemble the following:
The
minio-operator/minio-operatoris a legacy chart and should not be installed under normal circumstances. -
Install the Operator
Run the
helm installcommand to install the Operator. The following command specifies and creates a dedicated namespaceminio-operatorfor installation. MinIO strongly recommends using a dedicated namespace for the Operator. -
Verify the Operator installation
Check the contents of the specified namespace (
minio-operator) to ensure all pods and services have started successfully.The response should resemble the following:
You can now deploy a tenant using Helm Charts.
Install the MinIO Operator using Local Helm Charts
The following procedure installs the Operator using a local copy of the Helm Charts. This method may support easier pre-configuration of the Operator compared to the repo-based installation
-
Download the Helm charts
On your local host, download the Operator Helm charts to a convenient directory:
-
(Optional) Modify the
values.yamlThe chart contains a
values.yamlfile you can customize to suit your needs. For details on the options available in the MinIO Operatorvalues.yaml, see Operator Helm Charts.For example, you can change the number of replicas for
operator.replicaCountto increase or decrease pod availability in the deployment. See Operator Helm Charts for more complete documentation on the Operator Helm Chart and Values.For more about customizations, see Helm Charts.
-
Install the Helm Chart
Use the
helm installcommand to install the downloaded chart archive. -
To verify the installation, run the following command:
If you initialized the Operator with a custom namespace, replace
minio-operatorwith that namespace.With the chart defaults, the namespace should contain a
minio-operatorDeployment with two ready replicas, anoperatorClusterIP service on port4221, and anstsClusterIP service on port4223. Pod hashes, cluster IPs, and ages vary by installation.
You can now deploy a tenant using Helm Charts.
3 - Deploy Silo on Kubernetes
Silo is an S3-compatible object storage server that can run in Kubernetes. The final upstream MinIO Kubernetes Operator release, v7.1.1, can deploy a Tenant with the Silo image when tenant.image.repository is overridden to pgsty/silo and a tested tag or digest is pinned.
These guides assume familiarity with the referenced Kubernetes concepts, utilities, and procedures. They are not a replacement for the official Kubernetes Documentation, and the Silo project does not inherit the former MinIO vendor support matrix for Kubernetes distributions.
The MinIO Operator, its Helm charts, CRDs, and Tenant kind remain upstream contracts independent of Silo releases. The upstream minio/operator repository was archived and made read-only on 2026-03-20, so its release lifecycle is frozen and these guides are a compatibility snapshot.
The archived Operator code provides MinIO-compatible Tenant management and configuration. Validate the pinned Operator and chart against your cluster before deployment or upgrade; there is no ongoing upstream compatibility or support promise.
You can interact with the Operator through its Custom Resource Definition (CRD).
The CRD provides a customizable entry point for tools such as Kustomize, Helm, and kubectl to deploy and manage Silo-backed Tenants.
Important
The MinIO Operator Console UI is deprecated and removed in MinIO Operator 6.0.0.
You can continue to use standard Kubernetes approaches for MinIO Tenant management, such as Kustomize templates, Helm Charts, and kubectl commands for introspecting Tenant namespaces and resources.
4 - Deploy Silo on RHEL-Compatible Linux
This page documents deploying Silo on RHEL and binary-compatible Linux distributions.
Silo publishes RPM packages and standalone Linux archives for x86-64 and ARM64. The project does not publish a separate RHEL support-lifecycle matrix, so the inherited point-in-time release list has been removed. Use a distribution release still supported by its vendor, keep the kernel and system libraries current, and validate the exact storage and workload configuration before production use.
The procedure focuses on production-grade Multi-Node Multi-Drive (MNMD) “Distributed” configurations. MNMD deployments provide enterprise-grade performance, availability, and scalability and are the recommended topology for all production workloads.
The procedure includes guidance for deploying Single-Node Multi-Drive (SNMD) and Single-Node Single-Drive (SNSD) topologies in support of early development and evaluation environments.
Considerations
Review Checklists
Ensure you have reviewed our published Hardware, Software, and Security checklists before attempting this procedure.
Erasure Coding Parity
MinIO automatically determines the default erasure coding configuration for the cluster based on the total number of nodes and drives in the topology. You can configure the per-object parity setting when you set up the cluster or let MinIO select the default (EC:4 for production-grade clusters).
Parity controls the relationship between object availability and storage on disk. Use the MinIO Erasure Code Calculator for guidance in selecting the appropriate erasure code parity level for your cluster.
While you can change erasure parity settings at any time, objects written with a given parity do not automatically update to the new parity settings.
Capacity-Based Planning
MinIO recommends planning storage capacity sufficient to store at least 2 years of data before reaching 70% usage. Performing server pool expansion more frequently or on a “just-in-time” basis generally indicates an architecture or planning issue.
For example, consider an application suite expected to produce at least 100 TiB of data per year and a 3 year target before expansion. By ensuring the deployment has ~500TiB of usable storage up front, the cluster can safely meet the 70% threshold with additional buffer for growth in data storage output per year.
Consider using the MinIO Erasure Code Calculator for guidance in planning capacity around specific erasure code settings.
Procedure
1. Download the Silo RPM
Download the x86-64 or ARM64 RPM from Download & Install, verify its published checksum, and install it:
Current Silo releases do not publish the inherited ppc64le or s390x package variants.
2. Review the systemd Service File
The .rpm package install the following systemd service file to /usr/lib/systemd/system/minio.service:
3. Create a User and Group for MinIO
The minio.service file runs as the minio-user User and Group by default. You can create the user and group using the groupadd and useradd commands. The following example creates the user, group, and sets permissions to access the folder paths intended for use by MinIO. These commands typically require root (sudo) permissions.
The command above creates the user without a home directory, as is typical for system service accounts.
You must chown the drive paths you intend to use with MinIO. If the minio-user user or group cannot read, write, or list contents of any drive, the MinIO process returns errors on startup.
For example, the following command sets minio-user:minio-user as the user-group owner of all drives at /mnt/drives-n where n is between 1 and 16 inclusive:
4. Enable TLS Connectivity
Create or provide Transport Layer Security (TLS) certificates to MinIO to automatically enable HTTPS-secured connections between the server and clients.
Place the certificates in a directory accessible by the minio-user user/group:
For local testing or development environments, you can use the MinIO certgen to mint self-signed certificates. For example, the following command generates a self-signed certificate with a set of IP and DNS Subject Alternate Names (SANs) associated to the MinIO Server hosts:
Place the generated public.crt and private.key into the /path/to/certs directory to enable TLS for the MinIO deployment. Applications can use the public.crt as a trusted Certificate Authority to allow connections to the MinIO deployment without disabling certificate validation.
When MinIO runs with TLS enabled, it also verifies connecting client certificates against the OS list of trusted Certificate Authorities. To enable verification of third-party or internally-signed certificates, place the CA file in the /opt/minio/certs/CAs folder. The CA file should include the full chain of trust from leaf to root to ensure successful verification.
For more specific guidance on configuring MinIO for TLS, including multi-domain support via Server Name Indication (SNI), see Network Encryption (TLS). You can optionally skip this step to deploy without TLS enabled. MinIO strongly recommends against non-TLS deployments outside of early development.
5. Create the MinIO Environment File
Create an environment file at /etc/default/minio. The MinIO service uses this file as the source of all environment variables used by MinIO and the minio.service file.
Modify the example to reflect your deployment topology.
Use Multi-Node Multi-Drive (“Distributed”) deployment topologies in production environments.
Use Single-Node Multi-Drive deployments in development and evaluation environments. You can also use them for smaller storage workloads which can tolerate data loss or unavailability due to node downtime.
Use Single-Node Single-Drive (“Standalone”) deployments in early development and evaluation environments. MinIO does not recommend Standalone deployments in production, as the loss of the node or its storage medium results in data loss.
Important
SNSD deployments do not support storage expansion through adding new server pools.
Specify any other environment variables or server command-line options as required by your deployment.
For distributed deployments, all nodes must have matching /etc/default/minio environment files. Use a utility such as shasum -a 256 /etc/default/minio on each node to verify an exact match across all nodes.
6. Start the MinIO Deployment
Use systemctl start minio to start each node in the deployment.
You can track the status of the startup using journalctl -u minio on each node.
On successful startup, the MinIO process emits a summary of the deployment that resembles the following output:
You may see increased log churn as the cluster starts up and synchronizes.
Common reasons for startup failure include:
- The MinIO process does not have read-write-list access to the specified drives
- The drives are not empty or contain non-MinIO data
- The drives are not formatted or mounted properly
- One or more hosts are not reachable over the network
Following our checklists typically mitigates the risk of encountering those or similar issues.
7. Connect to the Deployment
Open your browser and access any of the MinIO hostnames at port :9001 to open the MinIO Console login page. For example, https://minio1.example.com:9001.
Log in with the MINIO_ROOT_USER and MINIO_ROOT_PASSWORD from the previous step.
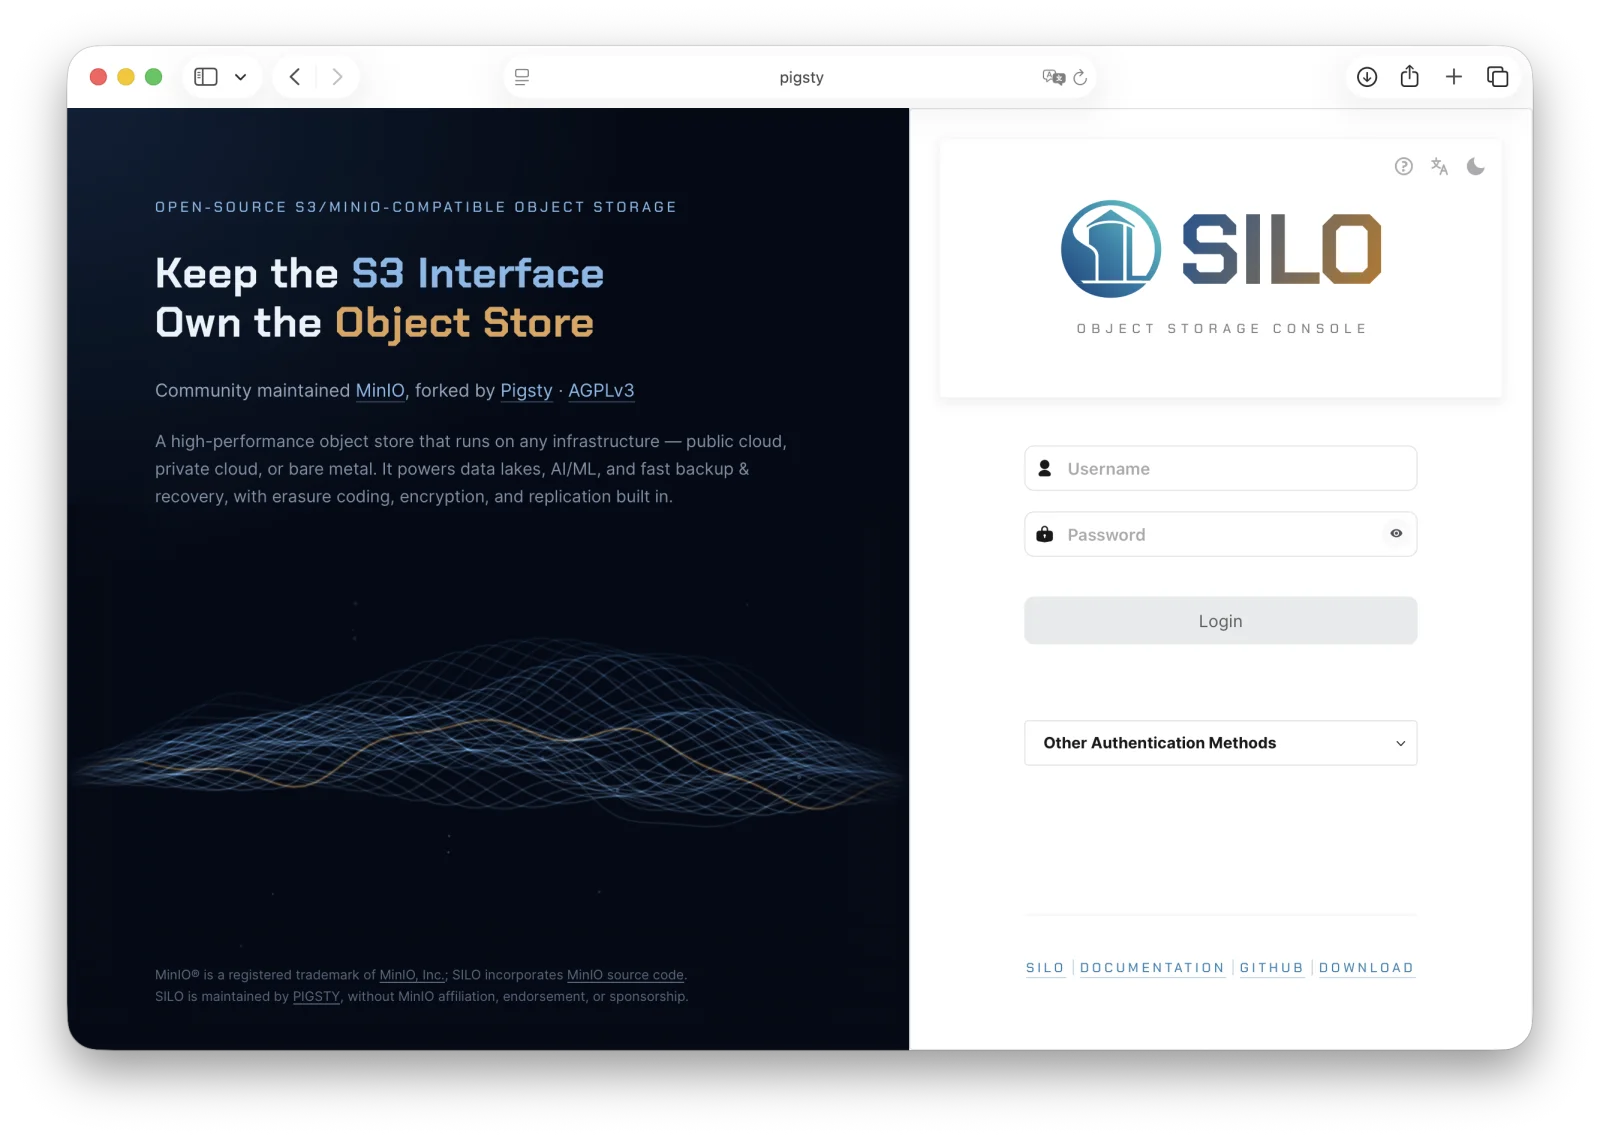
You can use the MinIO Console for general administration tasks like Identity and Access Management, Metrics and Log Monitoring, or Server Configuration. Each MinIO server includes its own embedded MinIO Console.
Follow the installation instructions for mc on your local host. Run mc --version to verify the installation.
If your MinIO deployment uses third-party or self-signed TLS certificates, copy the CA files to ~/.mc/certs/CAs to allow mc
Once installed, create an alias for the MinIO deployment:
Change the hostname, username, and password to reflect your deployment. The hostname can be any MinIO node in the deployment. You can also specify the hostname load balancer, reverse proxy, or similar network control plane that handles connections to the deployment.
8. Next Steps
- Enable TLS before exposing the service beyond a trusted network.
- Create least-privilege users and policies through Identity and Access Management.
- Configure monitoring and alerting, then test drive, node, and site recovery procedures before production use.
5 - Install the Silo Server
Install Silo on a physical machine or virtualized host using the current server artifacts and the platform-specific instructions in this section. The executable, service, package, and environment-variable contracts retain their MinIO-compatible names.
6 - Installation and Management
This section documents installing and managing the AGPLv3-licensed Silo object storage server on Kubernetes and bare-metal or virtualized infrastructure.
The minio executable, MINIO_* environment variables, S3 and Admin APIs, on-disk format, and MinIO Operator resource names are compatibility contracts. The prose uses the Silo brand, while commands and identifiers retain their compatible names.
Silo is an S3-compatible, software-defined distributed object storage server. The download page is the source of truth for currently published operating-system and architecture artifacts.
Silo uses Erasure Coding for object data. You can deploy it using one of the following topologies:
Single-Node Single-Drive (SNSD or “Standalone”)
Local development and evaluation with no/limited reliability
Single-Node Multi-Drive (SNMD or “Standalone Multi-Drive”)
Workloads with lower performance, scale, and capacity requirements
Drive-level reliability with configurable tolerance for loss of up to 1/2 all drives
Evaluation of multi-drive topologies and failover behavior.
Multi-Node Multi-Drive (MNMD or “Distributed”)
Enterprise-grade high-performance object storage
Multi Node/Drive level reliability with configurable tolerance for loss of up to 1/2 all nodes/drives
Primary storage for AI/ML, Distributed Query, Analytics, and other Data Lake components
Scalable for Petabyte+ workloads - both storage capacity and performance
Kubernetes
The archived MinIO Kubernetes Operator v7.1.1 can manage Tenant resources that run a Silo server image. The Operator, its charts, CRDs, and Tenant kind retain their upstream names; its upstream release lifecycle is now frozen.
These retained Operator guides describe a compatibility snapshot. The upstream repository was archived on 2026-03-20, so verify v7.1.1 against your Kubernetes distribution and override the Tenant image to pgsty/silo; the Silo project does not claim the former upstream vendor’s platform support matrix.
Baremetal
Silo can run on physical machines, virtualized hosts, or in a container. Consult the current download matrix and each platform page for the verified artifact and scope.
- Deploy Silo on Red Hat Linux
- Deploy Silo on Ubuntu Linux
- Deploy Silo as a Container
- Deploy Silo on macOS
- Deploy Silo on Windows
Important
Published artifacts do not establish equal production validation across platforms. Prefer a tested Linux or Kubernetes deployment for long-running workloads, pin exact package/image versions, and validate storage, failure domains, upgrade, and recovery behavior for the chosen topology.
7 - MinIO Kubernetes Operator
Silo is an S3-compatible object store. MinIO Operator is an upstream Kubernetes component whose repository was archived and made read-only on 2026-03-20. Its final release, v7.1.1, can manage a Silo server image through the Tenant CRD. The Operator name, API groups, CRD kinds, resource names, image names, and environment variables remain upstream contracts and are not rebranded here.
MinIO Operator installs Custom Resource Definitions (CRDs), including the Tenant kind used to describe managed object-storage workloads as Kubernetes objects.
The pinned v7.1.1 Kustomize manifest deploys the Operator in the minio-operator namespace as one minio-operator Deployment with two controller replicas. It does not deploy a separate Operator Console pod.
This site verifies the Silo image override used by its deployment examples. The archived Operator has no ongoing upstream platform-support or commercial-support commitment, and this site does not create one.
See the pinned MinIO Operator v7.1.1 CRD Reference for the upstream CRD contract.
Operator Prerequisites
Kubernetes Version
The archived v7.1.1 README requires Kubernetes 1.30.0 or later. Use a currently maintained Kubernetes release whose APIs remain compatible, and validate the exact combination in your own cluster. See the maintained Kubernetes releases and the Operator v7.1.1 release; Silo does not publish a broader Kubernetes support matrix.
Kubernetes infrastructure running end-of-life API versions may exhibit unexpected or undesired behavior if used for deploying the Operator.
Kustomize and kubectl
Kustomize is a YAML-based templating tool that allows you to define Kubernetes resources in a declarative and repeatable fashion. Kustomize is included with the kubectl command line tool.
This procedure assumes that your local host machine has both the matching version of kubectl for your Kubernetes cluster and the necessary access to that cluster to create new resources.
The pinned MinIO Operator v7.1.1 Kustomize template provides a reproducible starting point. You can modify that Kustomization file or apply your own patches for your cluster. Do not infer that a newer supported upstream release exists; review any fork or replacement independently.
Kubernetes TLS Certificate API
The MinIO Operator manages TLS Certificate Signing Requests (CSR) using the Kubernetes certificates.k8s.io TLS certificate management API to create signed TLS certificates in the following circumstances:
- When
autoCertis enabled. - For the Tenant Console when the
MINIO_CONSOLE_TLS_ENABLEenvironment variable is set toon. - For STS service when
OPERATOR_STS_ENABLEDenvironment variable is set toon. - For retrieving the health of the cluster.
The MinIO Operator reads certificates inside the operator-ca-tls secret and syncs this secret within the tenant namespace to trust private certificate authorities, such as when using cert-manager.
For any of these circumstances, the MinIO Operator requires that the Kubernetes kube-controller-manager configuration include the following configuration settings:
--cluster-signing-key-file- Specify the PEM-encoded RSA or ECDSA private key used to sign cluster-scoped certificates.--cluster-signing-cert-file- Specify the PEM-encoded x.509 Certificate Authority certificate used to issue cluster-scoped certificates.
The Kubernetes TLS API uses the CA signature algorithm when generating a new certificate. ECDSA (for example, the NIST P-256 curve) or EdDSA (for example, Curve25519) can require less computation than RSA. See Supported TLS Cipher Suites for the Silo server’s supported suites.
If the Kubernetes cluster is not configured to respond to a generated CSR, the Operator cannot complete initialization. Some Kubernetes providers do not specify these configuration values by default.
To check whether the kube-controller-manager specifies the cluster signing key and certificate files, use the following command:
- Replace
$CLUSTERNAMEwith the name of the Kubernetes cluster.
Confirm that the output contains the highlighted lines. The output of the example command above may differ from the output in your terminal:
Important
MinIO Operator can generate TLS certificates for Tenant pods using the specified Certificate Authority (CA). Clients external to the Kubernetes cluster must trust that CA to connect to the Silo Tenant endpoints.
Disabling TLS validation is suitable only for controlled testing. Production clients should trust the issuing CA or use certificates issued by a CA they already trust.
Alternatively, generate x.509 TLS certificates signed by a known and trusted CA and pass those certificates through the Tenant CRD. See Network Encryption (TLS) for more complete documentation.
8 - Deploy a Silo Tenant with Helm Charts
Overview
Helm is a tool for automating the deployment of applications to Kubernetes clusters. A Helm chart is a set of YAML files, templates, and other files that define the deployment details. The following procedure uses a Helm Chart to deploy a Tenant managed by the MinIO Operator.
This procedure requires the Kubernetes cluster have a valid Operator deployment. You cannot use the MinIO Operator Tenant chart to deploy a Tenant independent of the Operator.
Important
The MinIO Operator Tenant Chart is distinct from the server repository’s legacy community MinIO Chart. This guide uses the Operator Tenant Chart because it exposes an explicit Tenant image override. The upstream Operator repository was archived on March 20, 2026, so this guide pins its final v7.1.1 chart as a frozen compatibility baseline. Silo does not inherit upstream vendor support commitments.
Prerequisites
You must meet the following requirements to install a MinIO Tenant with Helm:
- An existing Kubernetes cluster
- The
kubectlCLI tool on your local host with version matching the cluster. - Helm version 3.8 or greater.
- yq version 4.18.1 or greater.
- An existing MinIO Operator installation.
This procedure assumes your Kubernetes cluster access grants you broad administrative permissions.
For more about Tenant installation requirements, including supported Kubernetes versions and TLS certificates, see the Tenant deployment prerequisites.
This procedure assumes familiarity with the referenced Kubernetes concepts and utilities. While this documentation may provide guidance for configuring or deploying Kubernetes-related resources on a best-effort basis, it is not a replacement for the official Kubernetes Documentation.
Namespace
The tenant must use its own namespace and cannot share a namespace with another tenant. In addition, MinIO strongly recommends using a dedicated namespace for the tenant with no other applications running in the namespace.
Deploy a Silo Tenant using Helm Charts
The following procedure deploys a MinIO Tenant using the MinIO Operator Chart Repository. This method supports a simplified installation path compared to the local chart installation.
The following procedure uses Helm to deploy a MinIO Tenant with the archived upstream Tenant Chart at v7.1.1.
Important
If you use Helm to deploy a MinIO Tenant, you must use Helm to manage or upgrade that deployment. Do not use kubectl krew, Kustomize, or similar methods to manage or upgrade the MinIO Tenant.
This procedure is not exhaustive of all possible configuration options available in the Tenant Chart. It provides a baseline from which you can modify and tailor the Tenant to your requirements.
-
Verify your MinIO Operator Repo Configuration
The archived project’s endpoint at https://operator.min.io currently serves the
v7.1.1chart. If the repository does not already exist in your local Helm configuration, add it before continuing:You can validate the repo contents using
helm search:The response should resemble the following:
-
Create a local copy of the Helm
values.yamlfor modificationOpen
values.yamlin your preferred text editor. Before continuing, replace the upstream server image defaults and disable the inherited in-place updater:Use a newer tag only after it is published on the Silo download page and validated for your deployment. Do not leave
quay.io/minio/minioorlatestin a Silo production values file. -
Configure the Tenant topology
The following fields share the
tenant.pools[0]prefix and control the number of servers, volumes per server, and storage class of all pods deployed in the Tenant:Field
Description
serversThe number of MinIO pods to deploy in the Server Pool.
volumesPerServerThe number of persistent volumes to attach to each MinIO pod (
servers). The Operator generatesvolumesPerServer x serversPersistent Volume Claims for the Tenant.storageClassNameThe Kubernetes storage class to associate with the generated Persistent Volume Claims.
If no storage class exists matching the specified value or if the specified storage class cannot meet the requested number of PVCs or storage capacity, the Tenant may fail to start.
sizeThe amount of storage to request for each generated PVC.
-
Configure Tenant Affinity or Anti-Affinity
The Tenant Chart supports the following Kubernetes Selector, Affinity and Anti-Affinity configurations:
- Node Selector (
tenant.nodeSelector) - Node/Pod Affinity or Anti-Affinity (
spec.pools[n].affinity)
MinIO recommends configuring Tenants with Pod Anti-Affinity to ensure that the Kubernetes schedule does not schedule multiple pods on the same worker node.
If you have specific worker nodes on which you want to deploy the tenant, pass those node labels or filters to the
nodeSelectororaffinityfield to constrain the scheduler to place pods on those nodes. - Node Selector (
-
Configure Network Encryption
The MinIO Tenant CRD provides the following fields with which you can configure tenant TLS network encryption:
Field
Description
tenant.certificate.requestAutoCertEnable or disable MinIO automatic TLS certificate generation.
Defaults to
trueor enabled if omitted.tenant.certificate.certConfigCustomize the behavior of automatic TLS, if enabled.
tenant.certificate.externalCertSecretEnable TLS for multiple hostnames via Server Name Indication (SNI).
Specify one or more Kubernetes secrets of type
kubernetes.io/tlsorcert-manager.tenant.certificate.externalCACertSecretEnable validation of client TLS certificates signed by unknown, third-party, or internal Certificate Authorities (CA).
Specify one or more Kubernetes secrets of type
kubernetes.io/tlscontaining the full chain of CA certificates for a given authority. -
Configure Silo Environment Variables
You can set the server’s
MINIO_*environment variables using thetenant.configurationfield. These names are MinIO-compatible contracts and must not be renamed.Field
Description
tenant.configurationSpecify a Kubernetes opaque secret whose data payload
config.envcontains each MinIO environment variable you want to set.The
config.envdata payload must be a base64-encoded string. You can create a local file, set your environment variables, and then usecat LOCALFILE | base64to create the payload.The YAML includes an object
kind: Secretwithmetadata.name: storage-configurationthat sets the root username, password, erasure parity settings, and enables Tenant Console.Modify this as needed to reflect your Tenant requirements.
-
Deploy the Tenant
Use
helmto install the Tenant Chart using yourvalues.yamlas an override:You can monitor the progress using the following command:
-
Expose the Tenant MinIO S3 API port
To test the MinIO Client
mcfrom your local machine, forward the MinIO port and create an alias.- Forward the Tenant’s MinIO port:
- Create an alias for the Tenant service:
You can use
mc mbto create a bucket on the Tenant:If you deployed your MinIO Tenant using TLS certificates minted by a trusted Certificate Authority (CA) you can omit the
--insecureflag.See Connect to the Tenant for additional documentation on external connectivity to the Tenant.
Deploy a Tenant using a Local Helm Chart
The following procedure deploys a Tenant using a local copy of the Helm Charts. This method may support easier pre-configuration of the Tenant compared to the repo-based installation.
-
Download the Helm charts
On your local host, pull the pinned Tenant chart and extract its default values into a separate override file:
Each chart contains a
values.yamlfile you can customize to suit your needs. For details on the options available in the MinIO Tenantvalues.yaml, see Tenant Helm Charts.Open
values.yamlin your preferred text editor. Settenant.image.repositorytopgsty/silo, pintenant.image.tagto a published Silo release, and addMINIO_UPDATE=offtotenant.env, exactly as shown in the repository-based procedure. -
Configure the Tenant topology
The following fields share the
tenant.pools[0]prefix and control the number of servers, volumes per server, and storage class of all pods deployed in the Tenant:Field
Description
serversThe number of MinIO pods to deploy in the Server Pool.
volumesPerServerThe number of persistent volumes to attach to each MinIO pod (
servers). The Operator generatesvolumesPerServer x serversPersistent Volume Claims for the Tenant.storageClassNameThe Kubernetes storage class to associate with the generated Persistent Volume Claims.
If no storage class exists matching the specified value or if the specified storage class cannot meet the requested number of PVCs or storage capacity, the Tenant may fail to start.
sizeThe amount of storage to request for each generated PVC.
-
Configure Tenant Affinity or Anti-Affinity
The Tenant Chart supports the following Kubernetes Selector, Affinity and Anti-Affinity configurations:
- Node Selector (
tenant.nodeSelector) - Node/Pod Affinity or Anti-Affinity (
spec.pools[n].affinity)
MinIO recommends configuring Tenants with Pod Anti-Affinity to ensure that the Kubernetes schedule does not schedule multiple pods on the same worker node.
If you have specific worker nodes on which you want to deploy the tenant, pass those node labels or filters to the
nodeSelectororaffinityfield to constrain the scheduler to place pods on those nodes. - Node Selector (
-
Configure Network Encryption
The MinIO Tenant CRD provides the following fields from which you can configure tenant TLS network encryption:
Field Description tenant.certificate.requestAutoCertEnables or disables MinIO automatic TLS certificate generation tenant.certificate.certConfigControls the settings for automatic TLS. Requires spec.requestAutoCert: truetenant.certificate.externalCertSecretSpecify one or more Kubernetes secrets of type kubernetes.io/tlsorcert-manager. MinIO uses these certificates for performing TLS handshakes based on hostname (Server Name Indication).tenant.certificate.externalCACertSecretSpecify one or more Kubernetes secrets of type kubernetes.io/tlswith the Certificate Authority (CA) chains which the Tenant must trust for allowing client TLS connections. -
Configure Silo Environment Variables
You can set the server’s
MINIO_*environment variables using thetenant.configurationfield. These names remain compatibility contracts.The field must specify a Kubernetes opaque secret whose data payload
config.envcontains each MinIO environment variable you want to set.The YAML includes an object
kind: Secretwithmetadata.name: storage-configurationthat sets the root username, password, erasure parity settings, and enables Tenant Console.Modify this as needed to reflect your Tenant requirements.
-
The following Helm command creates a Silo Tenant using the pinned local chart and reviewed values:
To deploy more than one Tenant, create a Helm chart with the details of the new Tenant and repeat the deployment steps. Redeploying the same chart updates the previously deployed Tenant.
-
Expose the Tenant MinIO port
To test the MinIO Client
mcfrom your local machine, forward the MinIO port and create an alias.-
Forward the Tenant’s MinIO port:
-
Create an alias for the Tenant service:
This example uses HTTPS with a certificate that the local client may not trust, so it includes
--insecure. If the Tenant presents a certificate trusted by the client, omit that flag. Confirm the service name generated for your Tenant instead of assuming a fixedsvc/minioname.
You can use
mc mbto create a bucket on the Tenant: -
See Connect to the Tenant for additional documentation on external connectivity to the Tenant.
9 - Deploy Silo on Bare Metal
Silo can run on physical machines, virtualized hosts, or in a container. The current download page publishes server artifacts for Linux, macOS, and Windows on x86-64 and ARM64; follow the platform-specific notes instead of assuming the same production validation on every operating system.
10 - Deploy Silo on Ubuntu Linux
This page documents deploying Silo on Ubuntu Linux.
Silo publishes DEB packages and standalone Linux archives for x86-64 and ARM64. The project does not publish a separate Ubuntu support-lifecycle matrix, so the inherited point-in-time release list has been removed. Use an Ubuntu release still supported by its distributor, keep the kernel and system libraries current, and validate the exact storage and workload configuration before production use.
The procedure focuses on production-grade Multi-Node Multi-Drive (MNMD) “Distributed” configurations. MNMD deployments provide enterprise-grade performance, availability, and scalability and are the recommended topology for all production workloads.
The procedure includes guidance for deploying Single-Node Multi-Drive (SNMD) and Single-Node Single-Drive (SNSD) topologies in support of early development and evaluation environments.
Considerations
Review Checklists
Ensure you have reviewed our published Hardware, Software, and Security checklists before attempting this procedure.
Erasure Coding Parity
MinIO automatically determines the default erasure coding configuration for the cluster based on the total number of nodes and drives in the topology. You can configure the per-object parity setting when you set up the cluster or let MinIO select the default (EC:4 for production-grade clusters).
Parity controls the relationship between object availability and storage on disk. Use the MinIO Erasure Code Calculator for guidance in selecting the appropriate erasure code parity level for your cluster.
While you can change erasure parity settings at any time, objects written with a given parity do not automatically update to the new parity settings.
Capacity-Based Planning
MinIO recommends planning storage capacity sufficient to store at least 2 years of data before reaching 70% usage. Performing server pool expansion more frequently or on a “just-in-time” basis generally indicates an architecture or planning issue.
For example, consider an application suite expected to produce at least 100 TiB of data per year and a 3 year target before expansion. By ensuring the deployment has ~500TiB of usable storage up front, the cluster can safely meet the 70% threshold with additional buffer for growth in data storage output per year.
Consider using the MinIO Erasure Code Calculator for guidance in planning capacity around specific erasure code settings.
Procedure
1. Download the Silo DEB
Download the DEB for your architecture from Download & Install, verify its published checksum, and install it. Use the arm64 filename on ARM64 hosts.
2. Review the systemd Service File
The .deb package install the following systemd service file to /usr/lib/systemd/system/minio.service:
3. Create a User and Group for MinIO
The minio.service file runs as the minio-user User and Group by default. You can create the user and group using the groupadd and useradd commands. The following example creates the user, group, and sets permissions to access the folder paths intended for use by MinIO. These commands typically require root (sudo) permissions.
The command above creates the user without a home directory, as is typical for system service accounts.
You must chown the drive paths you intend to use with MinIO. If the minio-user user or group cannot read, write, or list contents of any drive, the MinIO process returns errors on startup.
For example, the following command sets minio-user:minio-user as the user-group owner of all drives at /mnt/drives-n where n is between 1 and 16 inclusive:
4. Enable TLS Connectivity
You can skip this step to deploy without TLS enabled. MinIO strongly recommends against non-TLS deployments outside of early development.
Create or provide Transport Layer Security (TLS) certificates to MinIO to automatically enable HTTPS-secured connections between the server and clients.
MinIO expects the default certificate names of private.key and public.crt for the private and public keys respectively. Place the certificates in a directory accessible by the minio-user user/group:
MinIO verifies client certificates against the OS/System’s default list of trusted Certificate Authorities. To enable verification of third-party or internally-signed certificates, place the CA file in the /opt/minio/certs/CAs folder. The CA file should include the full chain of trust from leaf to root to ensure successful verification.
For more specific guidance on configuring MinIO for TLS, including multi-domain support via Server Name Indication (SNI), see Network Encryption (TLS).
For local testing or development environments, you can use the MinIO certgen to mint self-signed certificates. For example, the following command generates a self-signed certificate with a set of IP and DNS Subject Alternate Names (SANs) associated to the MinIO Server hosts:
Place the generated public.crt and private.key into the /path/to/certs directory to enable TLS for the MinIO deployment. Applications can use the public.crt as a trusted Certificate Authority to allow connections to the MinIO deployment without disabling certificate validation.
5. Create the MinIO Environment File
Create an environment file at /etc/default/minio. The MinIO service uses this file as the source of all environment variables used by MinIO and the minio.service file.
Modify the example to reflect your deployment topology.
Use Multi-Node Multi-Drive (“Distributed”) deployment topologies in production environments.
Use Single-Node Multi-Drive deployments in development and evaluation environments. You can also use them for smaller storage workloads which can tolerate data loss or unavailability due to node downtime.
Use Single-Node Single-Drive (“Standalone”) deployments in early development and evaluation environments. MinIO does not recommend Standalone deployments in production, as the loss of the node or its storage medium results in data loss.
Important
SNSD deployments do not support storage expansion through adding new server pools.
Specify any other environment variables or server command-line options as required by your deployment.
For distributed deployments, all nodes must have matching /etc/default/minio environment files. Use a utility such as shasum -a 256 /etc/default/minio on each node to verify an exact match across all nodes.
6. Start the MinIO Deployment
Use systemctl start minio to start each node in the deployment.
You can track the status of the startup using journalctl -u minio on each node.
On successful startup, the MinIO process emits a summary of the deployment that resembles the following output:
You may see increased log churn as the cluster starts up and synchronizes.
Common reasons for startup failure include:
- The MinIO process does not have read-write-list access to the specified drives
- The drives are not empty or contain non-MinIO data
- The drives are not formatted or mounted properly
- One or more hosts are not reachable over the network
Following our checklists typically mitigates the risk of encountering those or similar issues.
7. Connect to the Deployment
Open your browser and access any of the MinIO hostnames at port :9001 to open the MinIO Console login page. For example, https://minio1.example.com:9001.
Log in with the MINIO_ROOT_USER and MINIO_ROOT_PASSWORD from the previous step.
You can use the MinIO Console for general administration tasks like Identity and Access Management, Metrics and Log Monitoring, or Server Configuration. Each MinIO server includes its own embedded MinIO Console.
Follow the installation instructions for mc on your local host. Run mc --version to verify the installation.
If your MinIO deployment uses third-party or self-signed TLS certificates, copy the CA files to ~/.mc/certs/CAs to allow mc
Once installed, create an alias for the MinIO deployment:
Change the hostname, username, and password to reflect your deployment. The hostname can be any MinIO node in the deployment. You can also specify the hostname load balancer, reverse proxy, or similar network control plane that handles connections to the deployment.
8. Next Steps
- Enable TLS before exposing the service beyond a trusted network.
- Create least-privilege users and policies through Identity and Access Management.
- Configure monitoring and alerting, then test drive, node, and site recovery procedures before production use.
11 - Silo Tenants with MinIO Operator
A MinIO Tenant consists of a complete set of Kubernetes resources deployed within a namespace that support the MinIO Object Storage service.
This documentation assumes a MinIO Operator installation on the target Kubernetes infrastructure.
Prerequisites
Your Kubernetes infrastructure must meet the following prerequisites for deploying MinIO Tenants.
MinIO Kubernetes Operator
The procedures on this page require a valid installation of the MinIO Kubernetes Operator and assume the local host has a matching Operator installation. They use v7.1.1, the final upstream release before the repository was archived, as a frozen compatibility baseline.
See Deploy MinIO on Kubernetes for complete documentation on deploying the MinIO Operator.
Worker Nodes with Local Storage
MinIO strongly recommends deploying Tenants onto Kubernetes worker nodes with locally attached storage.
The Worker Nodes should meet MinIO’s hardware checklist for production environments.
Avoid colocating MinIO tenants on worker nodes that host other high-performance software. Where colocation is necessary, configure appropriate limits and constraints to guarantee MinIO access to the required compute and storage resources.
Persistent Volumes
Exclusive access to drives
MinIO requires exclusive access to the drives or volumes provided for object storage. No other processes, software, scripts, or persons should perform any actions directly on the drives or volumes provided to MinIO or the objects or files MinIO places on them.
Unless directed by MinIO Engineering, do not use scripts or tools to directly modify, delete, or move any of the data shards, parity shards, or metadata files on the provided drives, including from one drive or node to another. Such operations are very likely to result in widespread corruption and data loss beyond MinIO’s ability to heal.
MinIO can typically use any Kubernetes Persistent Volume (PV) that supports the ReadWriteOnce access mode. MinIO’s consistency guarantees require the exclusive storage access that ReadWriteOnce provides. Additionally, MinIO recommends setting a reclaim policy of Retain for the PVC StorageClass. Where possible, configure the Storage Class, CSI, or other provisioner underlying the PV to format volumes as XFS to ensure best performance.
For Kubernetes clusters where nodes have Direct Attached Storage, MinIO strongly recommends using the DirectPV CSI driver. DirectPV provides a distributed persistent volume manager that can discover, format, mount, schedule, and monitor drives across Kubernetes nodes. DirectPV addresses the limitations of manually provisioning and monitoring local persistent volumes.
For Tenants deploying onto Amazon Elastic, Azure, or Google Kubernetes, select the tabs below for specific guidance on PV configuration:
MinIO Tenants on EKS must use the EBS CSI Driver to provision the necessary underlying persistent volumes. MinIO strongly recommends using SSD-backed EBS volumes for best performance. MinIO strongly recommends deploying EBS-based PVs with the XFS filesystem. Create a StorageClass for the MinIO EBS PVs and set the csi.storage.k8s.io/fstype parameter to xfs .
MinIO recommends the following EBS volume types:
io2(Provisioned IOPS SSD) Preferredio1(Provisioned IOPS SSD)gp3(General Purpose SSD)gp2(General Purpose SSD)
For more information on EBS resources, see EBS Volume Types. For more information on StorageClass Parameters, see StorageClass Parameters.
MinIO Tenants on GKE should use the Compute Engine Persistent Disk CSI Driver to provision the necessary underlying persistent volumes.
MinIO recommends the following GKE CSI Driver storage classes:
standard-rwo(Balanced Persistent SSD)premium-rwo(Performance Persistent SSD)
MinIO strongly recommends SSD-backed disk types for best performance. For more information on GKE disk types, see Persistent Disks.
MinIO Tenants on AKS should use the Azure Disks CSI driver to provision the necessary underlying persistent volumes.
MinIO recommends the following AKS CSI Driver storage classes:
managed-csi(Standard SSD)managed-csi-premium(Premium SSD)
MinIO strongly recommends SSD-backed disk types for best performance. For more information on AKS disk types, see Azure disk types.
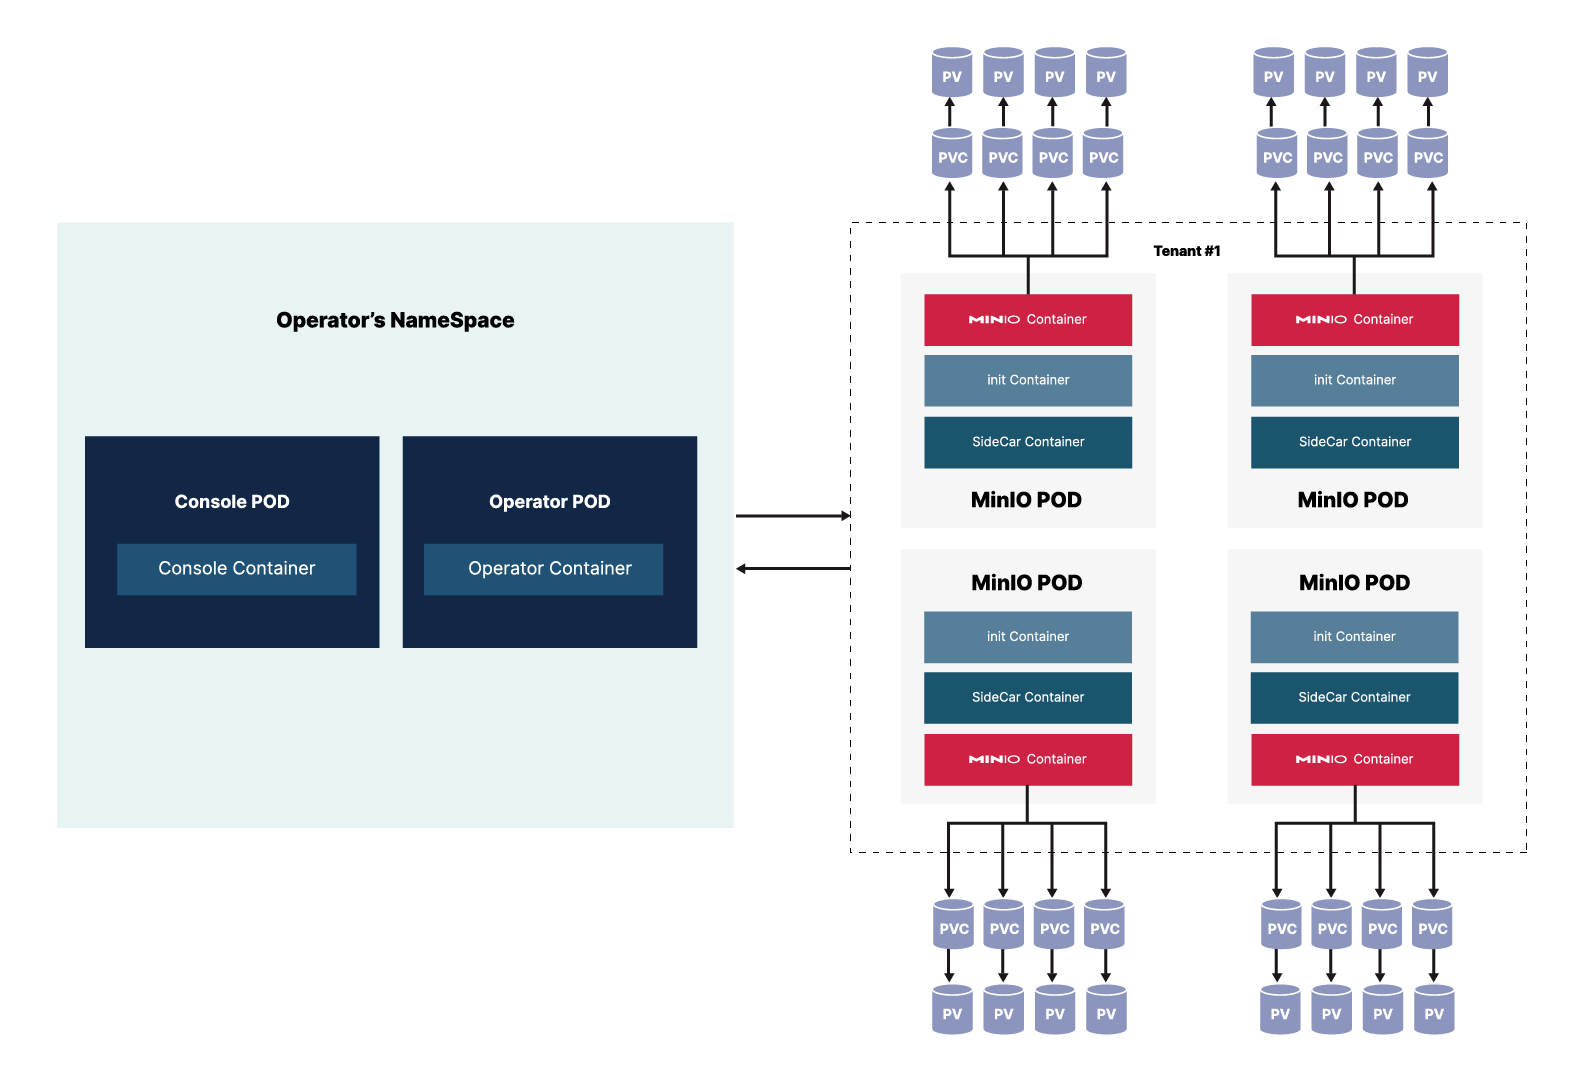
Tenant Namespace
When you use the Operator to create a tenant, the tenant must have its own namespace. Within that namespace, the Operator generates the pods required by the tenant configuration.
Each Tenant pod runs three containers:
- MinIO Container that runs all of the standard MinIO functions, equivalent to basic MinIO installation on baremetal. This container stores and retrieves objects in the provided mount points (persistent volumes).
- InitContainer that only exists during the launch of the pod to manage configuration secrets during startup. Once startup completes, this container terminates.
- SideCar container that monitors configuration secrets for the tenant and updates them as they change. This container also monitors for root credentials and creates an error if it does not find root credentials.
Starting with v5.0.6, the MinIO Operator supports custom init containers for additional pod initialization that may be required for your environment.
The tenant utilizes Persistent Volume Claims to talk to the Persistent Volumes that store the objects.
12 - Upgrade a Silo Deployment
Legacy upstream upgrades
If the deployment still runs an upstream MinIO release older than RELEASE.2024-03-30T09-41-56Z with AD/LDAP enabled, read the upstream notes for RELEASE.2024-04-18T19-09-19Z and complete its migration steps before moving to Silo. These names and links identify upstream release contracts and are intentionally retained.
Upgrade Silo by installing a verified server artifact on every node and then restarting the deployment as one coordinated operation. A full-cluster restart creates a brief availability interruption. Applications should retry failed or interrupted requests; operation atomicity does not remove the need for retry handling.
This page covers systemctl-managed and manually managed bare-metal deployments. When Ansible, Terraform, containers, or another orchestrator owns the service, apply the same release, verification, and restart boundaries through that tool instead of editing its managed files by hand.
Before You Upgrade
- Back up cluster settings. Export bucket metadata and IAM configuration with
mc admin cluster bucket exportandmc admin cluster iam export. - Choose a published Silo release. Use Download & Install, Silo release notes, and GitHub Releases. A local tag, branch commit, draft release, or uploaded draft asset is not a published release.
- Verify the artifact. Check its SHA-256 digest against the checksum published with that exact release. Pin one release across all nodes.
- Read every intervening release note. Pay particular attention to format, identity, configuration, and downgrade warnings.
- Test the exact upgrade in a lower environment. Exercise representative reads, writes, policies, lifecycle rules, replication, notifications, and recovery procedures before production.
- Disable the inherited in-place updater. Set
MINIO_UPDATE=offin the server environment and restart the service so the setting takes effect. - Check bucket-scoped policies for object-only resources. In the exported IAM configuration, look for statements that grant one of twelve bucket-level write actions — or
s3:*— on a resource pattern containing/, with no bare bucket ARN for the same bucket. Those statements no longer authorize those actions. Add the bare ARN alongside the object pattern; see Bucket and Object Resources. Built-in policies and any statement usingarn:aws:s3:::*are unaffected.
Do not use mc admin update ALIAS for Silo
As of 2026-08-05, an omitted update URL still selects the upstream dl.min.io feed and upstream MinIO signing key in the latest published Silo server. The command can therefore replace Silo with an upstream binary. Use the verified package or binary procedure below. The separate client command mc update is disabled and cannot perform an upgrade.
systemctl-Managed Deployments
-
Download the same published server release for every node from Download & Install, then verify its checksum.
-
Install the package or replace the binary on every node without restarting only part of the cluster:
Replace
/usr/local/bin/miniowith the path returned bycommand -v miniowhen your installation uses a different location. -
Run
minio --versionon every node. Do not proceed until every node reports the same intended release. -
Restart all server processes as one coordinated operation. Where the admin API is available, use:
Otherwise coordinate
systemctl restart minioacross all nodes through your automation. Do not improvise a rolling mixed-version deployment unless the target release explicitly supports it. -
Validate the deployment with
mc admin info, then test representative S3 reads and writes, console access, identity login, and any configured replication or notifications. -
Upgrade the client separately from Download & Install. Standalone artifacts use
mcli; source builds and the container retainmc.
Manually Managed Deployments
For a process managed by a user script or another supervisor, download and verify the same Silo binary on every node, replace the executable at the path used by that supervisor, confirm minio --version, and restart all nodes as one coordinated operation. The service account must be able to execute the new binary; the operator performing the replacement must be able to write its installation path.
After restart, run the same validation described above. Preserve the previous verified binary until validation completes so that any rollback decision can follow the target release’s documented downgrade constraints.
13 - Upgrade MinIO Operator
You can upgrade the MinIO Operator at any time without impacting your managed MinIO Tenants.
As part of the upgrade process, the Operator may update and restart Tenants to support changes to the MinIO Custom Resource Definition (CRD). These changes require no action on the part of any operator or administrator, and do not impact Tenant operations.
This page describes how to upgrade from Operator 5.0.15 to 7.1.1. See Upgrade MinIO Operator 4.5.8 and Later to 5.0.15 for instructions on upgrading to Operator 5.0.15 before starting this procedure.
Operator 6.0.0 Deprecates the Operator Console
Starting with Operator 6.0.0, the MinIO Operator Console is deprecated and removed.
You can continue to manage and deploy MinIO Tenants using standard Kubernetes approaches such as Kustomize or Helm.
Upgrade MinIO Operator 5.0.15 to 7.1.1
Important
Operator 6.0.0 deprecates the MinIO Operator Console and removes the related resources from the MinIO Operator CRD. This includes removal of Operator Console resources such as services and pods.
Use either Kustomization or Helm for managing Tenants moving forward.
The following procedure upgrades the MinIO Operator using Kustomize. For deployments using Operator 5.0.0 through 5.0.14, follow the Upgrade MinIO Operator 4.5.8 and Later to 5.0.15 procedure before performing this upgrade.
If you installed the Operator using Helm, use the Upgrade using Helm instructions instead.
-
(Optional) Update each MinIO Tenant to the latest stable MinIO Version.
Upgrading MinIO regularly ensures your Tenants have the latest features and performance improvements. Test upgrades in a lower environment such as a Dev or QA Tenant, before applying to your production Tenants. See Upgrade a MinIO Tenant for a procedure on upgrading MinIO Tenants.
-
Verify the existing Operator installation. Use
kubectl get all -n minio-operatorto verify the health and status of all Operator pods and services.If you installed the Operator to a custom namespace, specify that namespace as
-n <NAMESPACE>.You can verify the currently installed Operator version by retrieving the object specification for an operator pod in the namespace. The following example uses the
jqtool to filter the necessary information fromkubectl:The output resembles the following:
If your local host does not have the
jqutility installed, you can run the first part of the command and locate thespec.containerssection of the output. -
Upgrade Operator with Kustomize
The following command upgrades Operator to version 7.1.1:
In the sample output below,
configuredindicates where a new change was applied from the updated CRD: -
Validate the Operator upgrade
You can check the new Operator version with the same
kubectlcommand used previously:
The following procedure upgrades an existing MinIO Operator Installation using Helm.
If you installed the Operator using Kustomize, use the Upgrade using Kustomize instructions instead.
-
(Optional) Update each MinIO Tenant to the latest stable MinIO Version.
Upgrading MinIO regularly ensures your Tenants have the latest features and performance improvements. Test upgrades in a lower environment such as a Dev or QA Tenant, before applying to your production Tenants. See Upgrade a MinIO Tenant for a procedure on upgrading MinIO Tenants.
-
Verify the existing Operator installation.
Use
kubectl get all -n minio-operatorto verify the health and status of all Operator pods and services.If you installed the Operator to a custom namespace, specify that namespace as
-n <NAMESPACE>.Use the
helm listcommand to view the installed charts in the namespace:The result should resemble the following:
-
Update the Operator Repository
Use
helm repo update minio-operatorto update the MinIO Operator repo. If you set a different alias for the MinIO Operator repository, specify that in the command instead ofminio-operator. You can usehelm repo listto review your installed repositories.Use
helm searchto check the latest available chart version after updating the Operator Repo:The response should resemble the following:
The
minio-operator/minio-operatoris a legacy chart and should not be installed under normal circumstances. -
Run
helm upgradeHelm uses the latest chart to upgrade the MinIO Operator:
If you installed the MinIO Operator to a different namespace, specify that in the
-nargument.If you used a different installation name from
operator, replace the value above with the installation name.The command results should return success with a bump in the
REVISIONvalue. -
Validate the Operator upgrade
You can check the new Operator version with the same
kubectlcommand used previously:
14 - Deploy Silo as a Container
This page documents deploying Silo as a container on an operating system that supports containerized processes.
This documentation assumes installation of Docker, Podman, or a similar runtime which supports the standard container image format. Published pgsty/silo release images use Red Hat Universal Base Image 9 Micro.
Functionality and performance of the Silo container may be constrained by the base OS.
The procedure includes guidance for deploying Single-Node Multi-Drive (SNMD) and Single-Node Single-Drive (SNSD) topologies in support of early development and evaluation environments.
Important
These examples cover Single-Node Single-Drive and Single-Node Multi-Drive development or evaluation deployments. They do not define a production Multi-Node Multi-Drive topology or an upgrade contract for Docker Compose, Docker Swarm, or another container orchestrator. For a production distributed deployment, use a tested Kubernetes tenant workflow and validate persistence, networking, failure domains, and upgrades for your environment.
The examples use pgsty/silo:latest for readability. Pin a tested Silo release tag or image digest in production; latest is not a version contract.
SILO disables in-place self-update; MINIO_UPDATE=off does not re-enable it. Upgrade containers by replacing the image with a verified SILO tag or digest, not with mc admin update.
Considerations
Review Checklists
Ensure you have reviewed our published Hardware, Software, and Security checklists before attempting this procedure.
Erasure Coding Parity
Silo automatically determines the default erasure coding configuration for the cluster based on the total number of nodes and drives in the topology. You can configure the per-object parity setting when you set up the cluster or let Silo select the default (EC:4 for production-grade clusters).
Parity controls the relationship between object availability and storage on disk. The upstream MinIO Erasure Code Calculator can help compare parity levels; treat it as an upstream planning aid rather than a Silo support contract.
While you can change erasure parity settings at any time, objects written with a given parity do not automatically update to the new parity settings.
Container Storage
This procedure assumes you mount one or more dedicated storage devices to the container to act as persistent storage for Silo.
Data stored on ephemeral container paths is lost when the container restarts or is deleted. Use any such paths at your own risk.
Procedure
- Start the Container
This procedure provides instructions for Podman and Docker in rootfull mode. For rootless deployments, defer to documentation by each runtime for configuration and container startup.
For all other container runtimes, follow the documentation for that runtime and specify the equivalent options, parameters, or configurations.
The following command creates a folder in your home directory, then starts the Silo container using Podman:
The command binds ports 9000 and 9001 to the S3 API and Web Console respectively.
The local drive ~/silo/data is mounted to the /data folder on the container. You can modify the MINIO_ROOT_USER and MINIO_ROOT_PASSWORD variables to change the root login as needed.
For multi-drive deployments, bind each local drive or folder it’s on sequentially-numbered path on the remote. You can then modify the minio server startup to specify those paths:
For Windows hosts, specify the local folder path using Windows filesystem semantics C:\minio\:/data.
The following command creates a folder in your home directory, then starts the Silo container using Docker:
The command binds ports 9000 and 9001 to the S3 API and Web Console respectively.
The local drive ~/silo/data is mounted to the /data folder on the container. You can modify the MINIO_ROOT_USER and MINIO_ROOT_PASSWORD variables to change the root login as needed.
For multi-drive deployments, bind each local drive or folder it’s on sequentially-numbered path on the remote. You can then modify the minio server startup to specify those paths:
For Windows hosts, specify the local folder path using Windows filesystem semantics C:\minio\:/data.
2. Connect to the Deployment
Open your browser to http://localhost:9001 to open the Silo Console login page.
Log in with the MINIO_ROOT_USER and MINIO_ROOT_PASSWORD from the previous step.
You can use the embedded Console for general administration tasks like Identity and Access Management, Metrics and Log Monitoring, or Server Configuration.
Follow the Silo client installation instructions for mcli on your local host. Run mcli --version to verify the installation. Published standalone archives and Linux packages install mcli; source builds and the client container retain the mc executable name.
Once installed, create an alias for the Silo deployment:
Change the hostname, username, and password to reflect your deployment.
15 - Expand a Distributed Silo Deployment
Silo supports expanding an existing distributed deployment by adding a new Server Pool. Each pool expands the total available storage capacity of the cluster.
Expansion does not provide Business Continuity/Disaster Recovery (BC/DR)-grade protections. While each pool is an independent set of servers with distinct erasure sets for availability, the complete loss of one pool results in MinIO stopping I/O for all pools in the deployment. Similarly, an erasure set which loses quorum in one pool represents data loss of objects stored in that set, regardless of the number of other erasure sets or pools.
The new server pool does not need to use the same type or size of hardware and software configuration as any existing server pool, though doing so may allow for simplified cluster management and more predictable performance across pools. All drives in the new pool should be of the same type and size within the new pool. Review MinIO’s hardware recommendations for more complete guidance on selecting an appropriate configuration.
To provide BC-DR grade failover and recovery support for your single or multi-pool MinIO deployments, use site replication.
The procedure on this page expands an existing distributed MinIO deployment with an additional server pool.
Important
MinIO does not support expanding Single-Node Single-Drive topologies.
Prerequisites
Networking and Firewalls
Each node should have full bidirectional network access to every other node in the deployment. For containerized or orchestrated infrastructures, this may require specific configuration of networking and routing components such as ingress or load balancers. Certain operating systems may also require setting firewall rules. For example, the following command explicitly opens the default MinIO server API port 9000 on servers using firewalld:
All MinIO servers in the deployment must use the same listen port.
If you set a static MinIO Console port (e.g. :9001) you must also grant access to that port to ensure connectivity from external clients.
MinIO strongly recomends using a load balancer to manage connectivity to the cluster. The Load Balancer should use a “Least Connections” algorithm for routing requests to the MinIO deployment, since any MinIO node in the deployment can receive, route, or process client requests.
The following load balancers are known to work well with MinIO:
Configuring firewalls or load balancers to support MinIO is out of scope for this procedure. The Configure NGINX Proxy for MinIO Server reference provides a baseline configuration for using NGINX as a reverse proxy with basic load balancing configured.
Sequential Hostnames
MinIO requires using expansion notation {x...y} to denote a sequential series of MinIO hosts when creating a server pool. MinIO therefore requires using sequentially-numbered hostnames to represent each minio server process in the pool.
Create the necessary DNS hostname mappings prior to starting this procedure. For example, the following hostnames would support a 4-node distributed server pool:
minio5.example.comminio6.example.comminio7.example.comminio8.example.com
You can specify the entire range of hostnames using the expansion notation minio{5...8}.example.com.
Configuring DNS to support MinIO is out of scope for this procedure.
Storage Requirements
The following requirements summarize the Storage section of MinIO’s hardware recommendations:
Use Local Storage
Direct-Attached Storage (DAS) has significant performance and consistency advantages over networked storage (NAS, SAN, NFS). MinIO strongly recommends flash storage (NVMe, SSD) for primary or “hot” data.
Use XFS-Formatting for Drives
MinIO strongly recommends provisioning XFS formatted drives for storage. MinIO uses XFS as part of internal testing and validation suites, providing additional confidence in performance and behavior at all scales.
MinIO does not test nor recommend any other filesystem, such as EXT4, BTRFS, or ZFS.
Use Consistent Type of Drive
MinIO does not distinguish drive types and does not benefit from mixed storage types. Each pool must use the same type (NVMe, SSD)
For example, deploy a pool consisting of only NVMe drives. If you deploy some drives as SSD or HDD, MinIO treats those drives identically to the NVMe drives. This can result in performance issues, as some drives have differing or worse read/write characteristics and cannot respond at the same rate as the NVMe drives.
Use Consistent Size of Drive
MinIO limits the size used per drive to the smallest drive in the pool.
For example, deploy a pool consisting of the same number of NVMe drives with identical capacity of
7.68TiB. If you deploy one drive with3.84TiB, MinIO treats all drives in the pool as having that smaller capacity.
Configure Sequential Drive Mounting
MinIO uses Go expansion notation
{x...y}to denote a sequential series of drives when creating the new server pool, where all nodes in the server pool have an identical set of mounted drives. Configure drive mounting paths as a sequential series to best support this notation. For example, mount your drives using a pattern of/mnt/drive-n, wherenstarts at1and increments by1per drive.
Persist Drive Mounting and Mapping Across Reboots
Use
/etc/fstabto ensure consistent drive-to-mount mapping across node reboots.Non-Linux Operating Systems should use the equivalent drive mount management tool.
Exclusive access to drives
MinIO requires exclusive access to the drives or volumes provided for object storage. No other processes, software, scripts, or persons should perform any actions directly on the drives or volumes provided to MinIO or the objects or files MinIO places on them.
Unless directed by MinIO Engineering, do not use scripts or tools to directly modify, delete, or move any of the data shards, parity shards, or metadata files on the provided drives, including from one drive or node to another. Such operations are very likely to result in widespread corruption and data loss beyond MinIO’s ability to heal.
Minimum Drives for Erasure Code Parity
MinIO requires each pool satisfy the deployment erasure code settings. Specifically the new pool topology must support a minimum of 2 x EC:N drives per erasure set, where EC:N is the Standard parity storage class of the deployment. This requirement ensures the new server pool can satisfy the expected SLA of the deployment.
You can use the MinIO Erasure Code Calculator to check the Erasure Code Stripe Size (K+M) of your new pool. If the highest listed value is at least 2 x EC:N, the pool supports the deployment’s erasure parity settings.
Time Synchronization
Multi-node systems must maintain synchronized time and date to maintain stable internode operations and interactions. Make sure all nodes sync to the same time server regularly. Operating systems vary for methods used to synchronize time and date, such as with ntp, timedatectl, or timesyncd.
Check the documentation for your operating system for how to set up and maintain accurate and identical system clock times across nodes.
Back Up Cluster Settings First
Use the mc admin cluster bucket export and mc admin cluster iam export commands to take a snapshot of the bucket metadata and IAM configurations respectively prior to starting decommissioning. You can use these snapshots to restore bucket and IAM settings to recover from user or process errors as necessary.
Considerations
Writing Files
MinIO does not automatically rebalance objects across the new server pools. Instead, MinIO performs new write operations to the pool with the most free storage weighted by the amount of free space on the pool divided by the free space across all available pools.
The formula to determine the probability of a write operation on a particular pool is
Consider a situation where a group of three pools has a total of 10 TiB of free space distributed as:
- Pool A has 3 TiB of free space
- Pool B has 2 TiB of free space
- Pool C has 5 TiB of free space
MinIO calculates the probability of a write operation to each of the pools as:
- Pool A: 30% chance ()
- Pool B: 20% chance ()
- Pool C: 50% chance ()
In addition to the free space calculation, if a write option (with parity) would bring a drive usage above 99% or a known free inode count below 1000, MinIO does not write to the pool.
If desired, you can manually initiate a rebalance procedure with mc admin rebalance. For more about how rebalancing works, see managing objects across a deployment.
Likewise, MinIO does not write to pools in a decommissioning process.
Expansion is Non-Disruptive
Adding a new server pool requires restarting all MinIO server processes in the deployment at around same time.
MinIO strongly recommends restarting all MinIO Server processes in a deployment simultaneously. MinIO operations are atomic and strictly consistent. As such the restart procedure is non-disruptive to applications and ongoing operations.
Do not perform “rolling” (e.g. one node at a time) restarts.
Capacity-Based Planning
MinIO recommends planning storage capacity sufficient to store at least 2 years of data before reaching 70% usage. Performing server pool expansion more frequently or on a “just-in-time” basis generally indicates an architecture or planning issue.
For example, consider an application suite expected to produce at least 100 TiB of data per year and a 3 year target before expansion. The deployment has ~500TiB of usable storage in the initial server pool, such that the cluster safely met the 70% threshold with some buffer for data growth. The new server pool should ideally meet at minimum 500TiB of additional storage to allow for a similar lifespan before further expansion.
Since MinIO erasure coding requires some storage for parity, the total raw storage must exceed the planned usable capacity. Consider using the MinIO Erasure Code Calculator for guidance in planning capacity around specific erasure code settings.
Recommended Operating Systems
This tutorial assumes all hosts running MinIO use a recommended Linux operating system.
All hosts in the deployment should run with matching software configurations.
Expand a Distributed MinIO Deployment
The following procedure adds a Server Pool to an existing MinIO deployment. Each Pool expands the total available storage capacity of the cluster while maintaining the overall availability of the cluster.
All commands provided below use example values. Replace these values with those appropriate for your deployment.
Review the Prerequisites before starting this procedure.
Complete any planned hardware expansion prior to decommissioning older hardware pools.
1) Install the Silo Binary on Each Node in the New Server Pool
Install the same published Silo release used by the existing pool. Download the x86-64 or ARM64 RPM, DEB, or standalone archive from Download & Install, and verify its checksum before installation. The Silo release currently publishes those two Linux architectures; inherited references to unsupported ppc64le and s390x downloads have been removed.
Use the arm64 package name on ARM64 hosts.
Run minio --version on every new node and compare it with the existing pool. Do not join a node running a different release. For upgrades, follow the systemctl-managed Silo procedure.
2) Add TLS/SSL Certificates
MinIO enables Transport Layer Security (TLS) 1.2+ automatically upon detecting a valid x.509 certificate (.crt) and private key (.key) in the MinIO ${HOME}/.minio/certs directory.
For systemd-managed deployments, use the $HOME directory for the user which runs the MinIO server process. The provided minio.service file runs the process as minio-user. The previous step includes instructions for creating this user with a home directory /home/minio-user.
- Place TLS certificates into
/home/minio-user/.minio/certson each host. - If any MinIO server or client uses certificates signed by an unknown Certificate Authority (self-signed or internal CA), you must place the CA certs in the
/home/minio-user/.minio/certs/CAson all MinIO hosts in the deployment. MinIO rejects invalid certificates (untrusted, expired, or malformed).
If the minio.service file specifies a different user account, use the $HOME directory for that account. Alternatively, specify a custom certificate directory using the minio server --certs-dir commandline argument. Modify the MINIO_OPTS variable in /etc/default/minio to set this option. The systemd user which runs the MinIO server process must have read and listing permissions for the specified directory.
For more specific guidance on configuring MinIO for TLS, including multi-domain support via Server Name Indication (SNI), see Network Encryption (TLS). You can optionally skip this step to deploy without TLS enabled. MinIO strongly recommends against non-TLS deployments outside of early development.
3) Create the systemd Service File
The .deb or .rpm packages install the following systemd service file to /usr/lib/systemd/system/minio.service. For binary installations, create this file manually on all MinIO hosts.
Note
systemd checks the /etc/systemd/... path before checking the /usr/lib/systemd/... path and uses the first file it finds. To avoid conflicting or unexpected configuration options, check that the file only exists at the /usr/lib/systemd/system/minio.service path.
Refer to the man page for systemd.unit for details on the file path search order.
The minio.service file runs as the minio-user User and Group by default. You can create the user and group using the groupadd and useradd commands. The following example creates the user, group, and sets permissions to access the folder paths intended for use by MinIO. These commands typically require root (sudo) permissions.
The specified drive paths are provided as an example. Change them to match the path to those drives intended for use by MinIO.
Alternatively, change the User and Group values to another user and group on the system host with the necessary access and permissions.
MinIO publishes additional startup script examples on github.com/minio/minio-service.
To update deployments managed using systemctl, see Update systemctl-Managed MinIO Deployments.
4) Create the Service Environment File
Create an environment file at /etc/default/minio. The MinIO service uses this file as the source of all environment variables used by MinIO and the minio.service file.
The following examples assumes that:
-
The deployment has a single server pool consisting of four MinIO server hosts with sequential hostnames.
Each host has 4 locally attached drives with sequential mount points:
-
The new server pool consists of eight new MinIO hosts with sequential hostnames:
-
All hosts have eight locally-attached drives with sequential mount-points:
-
The deployment has a load balancer running at
https://minio.example.netthat manages connections across all MinIO hosts. The load balancer should not be routing requests to the new hosts at this step, but should have the necessary configuration updates planned.
Modify the example to reflect your deployment topology:
You may specify other environment variables or server commandline options as required by your deployment. All MinIO nodes in the deployment should include the same environment variables with the matching values.
5) Restart the MinIO Deployment with Expanded Configuration
Issue the following commands on each node simultaneously in the deployment to restart the MinIO service:
Use the following commands to confirm the service is online and functional:
MinIO may log an increased number of non-critical warnings while the server processes connect and synchronize. These warnings are typically transient and should resolve as the deployment comes online.
MinIO strongly recommends restarting all MinIO Server processes in a deployment simultaneously. MinIO operations are atomic and strictly consistent. As such the restart procedure is non-disruptive to applications and ongoing operations.
Do not perform “rolling” (e.g. one node at a time) restarts.
6) Next Steps
- Update any load balancers, reverse proxies, or other network control planes to route client requests to the new hosts in the MinIO distributed deployment. While MinIO automatically manages routing internally, having the control planes handle initial connection management may reduce network hops and improve efficiency.
- Review the MinIO Console to confirm the updated cluster topology and monitor performance.
16 - Modify a Silo Tenant
You can modify tenants after deployment to change mutable configuration settings. See MinIO Custom Resource Definition for a complete description of available settings in the MinIO Custom Resource Definition.
The method for modifying the Tenant depends on how you deployed the tenant:
For Kustomize-deployed Tenants, you can modify the base Kustomization resources and apply them using kubectl apply -k against the directory containing the kustomization.yaml object.
Modify the path to the Kustomization directory to match your local configuration.
For Helm-deployed Tenants, you can modify the base values.yaml and upgrade the Tenant using the chart:
The command above assumes use of the MinIO Operator Chart repository. If you installed the Chart manually or by using a different repository name, specify that chart or name in the command.
Replace TENANT-NAME and TENANT-NAMESPACE with the name and namespace of the Tenant, respectively. You can use helm list -n TENANT-NAMESPACE to validate the Tenant name.
Add Trusted Certificate Authorities
The MinIO Tenant validates the TLS certificate presented by each connecting client against the host system’s trusted root certificate store. The MinIO Operator can attach additional third-party Certificate Authorities (CA) to the Tenant to allow validation of client TLS certificates signed by those CAs.
To customize the trusted CAs mounted to each Tenant MinIO pod, enable the Custom Certificates switch. Select the Add CA Certificate + button to add third party CA certificates.
If the MinIO Tenant cannot match an incoming client’s TLS certificate issuer against either the container OS’s trust store or an explicitly attached CA, MinIO rejects the connection as invalid.
Manage Tenant Pools
Specify Runtime Class
Added: Console
0.23.1
When adding a new pool or modifying an existing pool for a tenant, you can specify the Runtime Class Name for pools to use.
Decommission a Tenant Server Pool
MinIO Operator 4.4.13 and later support decommissioning a server pool in a Tenant. Specifically, you can follow the Decommission a Server pool procedure to remove the pool from the tenant, then edit the tenant YAML to drop the pool from the StatefulSet. When removing the Tenant pool, ensure the spec.pools.[n].name fields have values for all remaining pools.
Maintain pool order when decommissioning and then adding
If you decommission one pool in a multiple pool deployment, you cannot use the same node sequence for a new pool. For example, consider a deployment with the following pools:
If you decommission the minio-{5...8} pool, you cannot add a new pool with the same node numbering. You must add the new pool after minio-{9...12}:
17 - Decommission Server Pools
MinIO supports decommissioning and removing server pools from a deployment with two or more pools. To decommission, there must be at least one remaining pool with sufficient available space to receive the objects from the decommissioned pools.
Starting with RELEASE.2023-01-18T04-36-38Z, MinIO supports queueing multiple pools in a single decommission command. Each listed pool immediately enters a read-only status, but draining occurs one pool at a time.
Decommissioning is designed for removing an older server pool whose hardware is no longer sufficient or performant compared to the pools in the deployment. MinIO automatically migrates data from the decommissioned pools to the remaining pools in the deployment based on the ratio of free space available in each pool.
During the decommissioning process, MinIO routes read operations (e.g. GET, LIST, HEAD) normally. MinIO routes write operations (e.g. PUT, versioned DELETE) to the remaining “active” pools in the deployment. Versioned objects maintain their ordering throughout the migration process.
The procedures on this page decommission and remove one or more server pools from a distributed MinIO deployment with at least two server pools.
Decommissioning is Permanent
Once MinIO begins decommissioning a pool, it marks that pool as permanently inactive (“draining”). Cancelling or otherwise interrupting the decommissioning procedure does not restore the pool to an active state. Use extra caution when decommissioning multiple pools.
Decommissioning is a major administrative operation that requires care in planning and execution, and is not a trivial or ‘daily’ task.
MinIO SUBNET users can log in and create a new issue related to decommissioning. Coordination with MinIO Engineering via SUBNET can ensure successful decommissioning, including performance testing and health diagnostics.
Community users can seek support on the MinIO Community Slack. Community Support is best-effort only and has no SLAs around responsiveness.
Prerequisites
Back Up Cluster Settings First
Use the mc admin cluster bucket export and mc admin cluster iam export commands to take a snapshot of the bucket metadata and IAM configurations respectively prior to starting decommissioning. You can use these snapshots to restore bucket/IAM settings to recover from user or process errors as necessary.
Networking and Firewalls
Each node should have full bidirectional network access to every other node in the deployment. For containerized or orchestrated infrastructures, this may require specific configuration of networking and routing components such as ingress or load balancers. Certain operating systems may also require setting firewall rules. For example, the following command explicitly opens the default MinIO server API port 9000 on servers using firewalld:
If you set a static MinIO Console port (e.g. :9001) you must also grant access to that port to ensure connectivity from external clients.
MinIO strongly recomends using a load balancer to manage connectivity to the cluster. The Load Balancer should use a “Least Connections” algorithm for routing requests to the MinIO deployment, since any MinIO node in the deployment can receive, route, or process client requests.
The following load balancers are known to work well with MinIO:
Configuring firewalls or load balancers to support MinIO is out of scope for this procedure.
Deployment Must Have Sufficient Storage
The decommissioning process migrates objects from the target pool to other pools in the deployment. The total available storage on the deployment must exceed the total storage of the decommissioned pool.
Use the Erasure Code Calculator to determine the usable storage capacity. Then reduce that by the size of the objects already on the deployment.
For example, consider a deployment with the following distribution of used and free storage:
Pool 1 |
100TB Used |
200TB Total |
Pool 2 |
100TB Used |
200TB Total |
Pool 3 |
100TB Used |
200TB Total |
Decommissioning Pool 1 requires distributing the 100TB of used storage across the remaining pools. Pool 2 and Pool 3 each have 100TB of unused storage space and can safely absorb the data stored on Pool 1.
However, if Pool 1 were full (e.g. 200TB of used space), decommissioning would completely fill the remaining pools and potentially prevent any further write operations.
Considerations
Replacing a Server Pool
For hardware upgrade cycles where you replace old pool hardware with a new pool, you should add the new pool through expansion before starting the decommissioning of the old pool. Adding the new pool first allows the decommission process to transfer objects in a balanced way across all available pools, both existing and new.
Complete any planned hardware expansion prior to decommissioning older hardware pools.
Decommissioning requires that a cluster’s topology remain stable throughout the pool draining process. Do not attempt to perform expansion and decommission changes in a single step.
Decommissioning is Resumable
MinIO resumes decommissioning if interrupted by transient issues such as deployment restarts or network failures.
For manually cancelled or failed decommissioning attempts, MinIO resumes only after you manually re-initiate the decommissioning operation.
The pool remains in the decommissioning state regardless of the interruption. A pool can never return to active status after decommissioning begins.
Decommissioning is Non-Disruptive
Removing a decommissioned server pool requires restarting all MinIO nodes in the deployment at around the same time.
MinIO strongly recommends restarting all MinIO Server processes in a deployment simultaneously. MinIO operations are atomic and strictly consistent. As such the restart procedure is non-disruptive to applications and ongoing operations.
Do not perform “rolling” (e.g. one node at a time) restarts.
Decommissioning Ignores Expired Objects and Trailing DeleteMarker
Starting with RELEASE.2023-05-27T05-56-19Z, decommissioning ignores objects where the only remaining version is a DeleteMarker. This avoids creating empty metadata on the remaining server pool(s) for objects that are effectively fully deleted.
Starting with RELEASE.2023-06-23T20-26-00Z, decommissioning also ignores object versions which have expired based on the configured lifecycle rules for the parent bucket. Starting with RELEASE.2023-06-29T05-12-28Z, you can monitor ignored delete markers and expired objects during the decommission process with mc admin trace --call decommission.
Once the decommissioning process completes, you can safely shut down that pool. Since the only remaining data was scheduled for deletion or was only a DeleteMarker, you can safely clear or destroy those drives as per your internal procedures.
Behavior
Final Listing Check
At the end of the decommission process, MinIO checks for a list of items on the pool. If the list returns empty, MinIO marks the decommission as successfully completed. If any objects return, MinIO returns an error that the decommission process failed.
If the decommission fails, customers should open a MinIO SUBNET issue for further assistance before retrying the decommission. Community users without a SUBNET subscription can retry the decommission process or seek additional support through the MinIO Community Slack. MinIO provides Community Support at best-effort only and provides no SLA around responsiveness.
Decommissioning a Server with Tiering Enabled
Changed: RELEASE.2023-03-20T20-16-18Z
For deployments with tiering enabled and active, decommissioning moves the object references to a new active pool. Applications can continue issuing GET requests against those objects where MinIO handles transparently retrieving them from the remote tier.
In older MinIO versions, tiering configurations prevent decommissioning.
Decommission a Server Pool
1) Review the MinIO Deployment Topology
The mc admin decommission command returns a list of all pools in the MinIO deployment:
The command returns output similar to the following:
The example deployment above has three pools. Each pool has four servers with four drives each.
Identify the target pool for decommissioning and review the current capacity. The remaining pools in the deployment must have sufficient total capacity to migrate all object stored in the decommissioned pool.
In the example above, the deployment has 210TiB total storage with 110TiB used. The first pool (minio-{01...04}) is the decommissioning target, as it was provisioned when the MinIO deployment was created and is completely full. The remaining newer pools can absorb all objects stored on the first pool without significantly impacting total available storage.
2) Start the Decommissioning Process
Decommissioning is Permanent
Once MinIO begins decommissioning a pool, it marks that pool as permanently inactive (“draining”). Cancelling or otherwise interrupting the decommissioning procedure does not restore the pool to an active state.
Review and validate that you are decommissioning the correct pool before running the following command.
Use the mc admin decommission start command to begin decommissioning the target pool. Specify the alias of the deployment and the full description of the pool to decommission, including all hosts, disks, and file paths.
The example command begins decommissioning the matching server pool on the myminio deployment.
During the decommissioning process, MinIO continues routing read operations (GET, LIST, HEAD) to the pool for those objects not yet migrated. MinIO routes all new write operations (PUT) to the remaining pools in the deployment.
Load balancers, reverse proxy, or other network control components which manage connections to the deployment do not need to modify their configurations at this time.
3) Monitor the Decommissioning Process
Use the mc admin decommission status command to monitor the decommissioning process.
The command returns output similar to the following:
You can retrieve more detailed information by specifying the description of the server pool to the command:
The command returns output similar to the following:
mc admin decommission status marks the Status as Complete once decommissioning is completed. You can move on to the next step once decommissioning is completed.
If Status reads as failed, you can re-run the mc admin decommission start command to resume the process. For persistent failures, use mc admin logs or review the systemd logs (e.g. journalctl -u minio) to identify more specific errors.
4) Remove the Decommissioned Pool from the Deployment Configuration
As each pool completes decommissioning, you can safely remove it from the deployment configuration. Modify the startup command for each remaining MinIO server in the deployment and remove the decommissioned pool.
The .deb or .rpm packages install a systemd service file to /lib/systemd/system/minio.service. For binary installations, this procedure assumes the file was created manually as per the Installation and Management procedure.
The minio.service file uses an environment file located at /etc/default/minio for sourcing configuration settings, including the startup. Specifically, the MINIO_VOLUMES variable sets the startup command:
The command returns output similar to the following:
Edit the environment file and remove the decommissioned pool from the MINIO_VOLUMES value.
5) Update Network Control Plane
Update any load balancers, reverse proxies, or other network control planes to remove the decommissioned server pool from the connection configuration for the MinIO deployment.
Specific instructions for configuring network control plane components is out of scope for this procedure.
6) Restart the MinIO Deployment
Issue the following commands on each node simultaneously in the deployment to restart the MinIO service:
Use the following commands to confirm the service is online and functional:
MinIO may log an increased number of non-critical warnings while the server processes connect and synchronize. These warnings are typically transient and should resolve as the deployment comes online.
MinIO strongly recommends restarting all MinIO Server processes in a deployment simultaneously. MinIO operations are atomic and strictly consistent. As such the restart procedure is non-disruptive to applications and ongoing operations.
Do not perform “rolling” (e.g. one node at a time) restarts.
Once the deployment is online, use mc admin info to confirm the uptime of all remaining servers in the deployment.
Decommission Multiple Server Pools
Changed: RELEASE.2023-01-18T04-36-38Z
You can start the decommission process for multiple server pools when issuing a decommission command.
After entering the command:
- MinIO immediately stops write access to all pools to be decommissioned.
- Decommissioning happens one pool at a time.
- Each pool completes the decommission draining process before MinIO begins draining the next pool.
To decommission multiple server pools from one command, add the full description of each server pool to decommission as a comma-separated list.
All other considerations about decommissioning apply when performing the process on multiple servers.
- Decommissioning is permanent.
- Once you mark the pools as decommissioned, you cannot restore them.
- Confirm you select the intended pools.
1) Review the MinIO Deployment Topology
The mc admin decommission command returns a list of all pools in the MinIO deployment:
The command returns output similar to the following:
The example deployment above has three pools. Each pool has four servers with four drives each.
Identify the target pool for decommissioning and review the current capacity. The remaining pools in the deployment must have sufficient total capacity to migrate all object stored in the decommissioned pool.
In the example above, the deployment has 1110TiB total storage with 145TiB used.
- The first pool (
minio-{01...04}) is the first decommissioning target, as it was provisioned when the MinIO deployment was created and is completely full. - The second pool (
minio-{05...08}) is the second decommissioning target, as it was also provisioned when the MinIO deployment was created and is nearly full. - The fourth pool (
minio-{13...16}) is a newly added pool with new hardware from a completed server expansion.
The third and fourth pools can absorb all objects stored on the first pool without significantly impacting total available storage.
Important
Complete any server expansion to add new storage resources before beginning a decommission process.
2) Start the Decommissioning Process
Decommissioning is Permanent
Once MinIO begins decommissioning the pools, it marks those pools as permanently inactive (“draining”). Cancelling or otherwise interrupting the decommissioning procedure does not restore the pools to an active state.
Review and validate that you are decommissioning the correct pools before running the following command.
Use the mc admin decommission start command to begin decommissioning the target pool. Specify the alias of the deployment and a comma-separated list of the full description of each pool to decommission, including all hosts, disks, and file paths.
The example command begins decommissioning the two listed matching server pools on the myminio deployment.
During the decommissioning process, MinIO continues routing read operations (GET, LIST, HEAD) operations to the pools for those objects not yet migrated. MinIO routes all new write operations (PUT) to the remaining pools in the deployment not scheduled for decommissioning.
Draining of decommissioned pools happens one pool at a time, completing the decommission of each pool in sequence. Draining does not happen concurrently for all decommissioning pools.
Load balancers, reverse proxy, or other network control components which manage connections to the deployment do not need to modify their configurations at this time.
3) Monitor the Decommissioning Process
Use the mc admin decommission status command to monitor the decommissioning process.
The command returns output similar to the following:
You can retrieve more detailed information by specifying the description of the server pool to the command:
The command returns output similar to the following:
mc admin decommission status marks the Status as Complete once decommissioning is completed. You can move on to the next step once MinIO completes decommissioning for all pools.
If Status reads as failed, you can re-run the mc admin decommission start command to resume the process. For persistent failures, use mc admin logs or review the systemd logs (e.g. journalctl -u minio) to identify more specific errors.
4) Remove the Decommissioned Pools from the Deployment Configuration
Once decommissioning completes, you can safely remove the pools from the deployment configuration. Modify the startup command for each remaining MinIO server in the deployment and remove the decommissioned pool.
The .deb or .rpm packages install a systemd service file to /lib/systemd/system/minio.service. For binary installations, this procedure assumes the file was created manually as per the Installation and Management procedure.
The minio.service file uses an environment file located at /etc/default/minio for sourcing configuration settings, including the startup. Specifically, the MINIO_VOLUMES variable sets the startup command:
The command returns output similar to the following:
Edit the environment file and remove the decommissioned pools from the MINIO_VOLUMES value.
5) Update Network Control Plane
Update any load balancers, reverse proxies, or other network control planes to remove the decommissioned server pools from the connection configuration for the MinIO deployment.
Specific instructions for configuring network control plane components is out of scope for this procedure.
6) Restart the MinIO Deployment
Issue the following commands on each node simultaneously in the deployment to restart the MinIO service:
Use the following commands to confirm the service is online and functional:
MinIO may log an increased number of non-critical warnings while the server processes connect and synchronize. These warnings are typically transient and should resolve as the deployment comes online.
MinIO strongly recommends restarting all MinIO Server processes in a deployment simultaneously. MinIO operations are atomic and strictly consistent. As such the restart procedure is non-disruptive to applications and ongoing operations.
Do not perform “rolling” (e.g. one node at a time) restarts.
Once the deployment is online, use mc admin info to confirm the uptime of all remaining servers in the deployment.
18 - Deploy Silo on macOS
This page documents deploying Silo onto Apple macOS hosts for development and evaluation.
Silo publishes separate macOS archives for Intel and Apple Silicon. The current project CI runs on Linux and does not establish a macOS support-lifecycle guarantee, so the inherited, dated list of “supported” macOS releases has been removed. Validate the exact operating-system version and workload before production use.
The procedure includes guidance for deploying Single-Node Multi-Drive (SNMD) and Single-Node Single-Drive (SNSD) topologies in support of early development and evaluation environments.
This guide does not validate Multi-Node Multi-Drive (MNMD) distributed configurations on macOS hosts.
Considerations
Review Checklists
Ensure you have reviewed our published Hardware, Software, and Security checklists before attempting this procedure.
Erasure Coding Parity
MinIO automatically determines the default erasure coding configuration for the cluster based on the total number of nodes and drives in the topology. You can configure the per-object parity setting when you set up the cluster or let MinIO select the default (EC:4 for production-grade clusters).
Parity controls the relationship between object availability and storage on disk. Use the MinIO Erasure Code Calculator for guidance in selecting the appropriate erasure code parity level for your cluster.
While you can change erasure parity settings at any time, objects written with a given parity do not automatically update to the new parity settings.
Procedure
1. Download the Silo Binary
Choose the Intel (darwin_amd64) or Apple Silicon (darwin_arm64) archive from Download & Install. Verify the archive against the checksum published with the same release, extract it, and install the minio compatibility binary:
The old Homebrew commands on this page installed the upstream MinIO formula, not Silo, and have therefore been removed.
2. Enable TLS Connectivity
You can skip this step to deploy without TLS enabled. MinIO strongly recommends against non-TLS deployments outside of early development.
Create or provide Transport Layer Security (TLS) certificates to MinIO to automatically enable HTTPS-secured connections between the server and clients.
MinIO expects the default certificate names of private.key and public.crt for the private and public keys respectively. Place the certificates in a dedicated directory:
MinIO verifies client certificates against the OS/System’s default list of trusted Certificate Authorities. To enable verification of third-party or internally-signed certificates, place the CA file in the /opt/minio/certs/CAs folder. The CA file should include the full chain of trust from leaf to root to ensure successful verification.
For more specific guidance on configuring MinIO for TLS, including multi-domain support via Server Name Indication (SNI), see Network Encryption (TLS).
For local testing or development environments, you can use the MinIO certgen to mint self-signed certificates. For example, the following command generates a self-signed certificate with a set of IP and DNS Subject Alternate Names (SANs) associated to the MinIO Server hosts:
Place the generated public.crt and private.key into the /path/to/certs directory to enable TLS for the MinIO deployment. Applications can use the public.crt as a trusted Certificate Authority to allow connections to the MinIO deployment without disabling certificate validation.
3. Create the MinIO Environment File
Create an environment file at /etc/default/minio. The MinIO service uses this file as the source of all environment variables used by MinIO and the minio.service file.
Modify the example to reflect your deployment topology.
Use Single-Node Multi-Drive deployments in development and evaluation environments. You can also use them for smaller storage workloads which can tolerate data loss or unavailability due to node downtime.
Use Single-Node Single-Drive (“Standalone”) deployments in early development and evaluation environments. MinIO does not recommend Standalone deployments in production, as the loss of the node or its storage medium results in data loss.
Specify any other environment variables or server command-line options as required by your deployment.
MINIO_CONFIG_ENV_FILE is parsed by the server; it is not sourced as a shell script. Quote values when leading or trailing spaces are significant. Named configuration targets may contain visible punctuation such as my-hook; malformed keys, NUL, and invisible characters stop startup with a value-redacted file-and-line error. See Config Environment Files Are Not Shell Scripts.
4. Start the MinIO Server
The following command starts the MinIO Server attached to the current terminal/shell window:
The command output resembles the following:
The API block lists the network interfaces and port on which clients can access the MinIO S3 API. The Console block lists the network interfaces and port on which clients can access the MinIO Web Console.
To run the MinIO server process in the background or as a daemon, defer to the macOS documentation for best practices and procedures.
5. Connect to the Deployment
Open your browser and access any of the MinIO hostnames at port :9001 to open the MinIO Console login page. For example, https://minio1.example.com:9001.
Log in with the MINIO_ROOT_USER and MINIO_ROOT_PASSWORD from the previous step.
You can use the MinIO Console for general administration tasks like Identity and Access Management, Metrics and Log Monitoring, or Server Configuration. Each MinIO server includes its own embedded MinIO Console.
Follow the installation instructions for mc on your local host. Run mc --version to verify the installation.
If your MinIO deployment uses third-party or self-signed TLS certificates, copy the CA files to ~/.mc/certs/CAs to allow mc
Once installed, create an alias for the MinIO deployment:
Change the hostname, username, and password to reflect your deployment. The hostname can be any MinIO node in the deployment. You can also specify the hostname load balancer, reverse proxy, or similar network control plane that handles connections to the deployment.
6. Next Steps
- Enable TLS before exposing the service beyond a trusted development network.
- Create least-privilege users and policies through Identity and Access Management.
- Configure monitoring and alerting before relying on the deployment for persistent data.
19 - Upgrade a Silo Tenant
The following procedures upgrade a single Silo Tenant using either Kustomize or Helm. Test the exact server image, Operator/chart version, and rollback procedure in a non-production Tenant first.
Keep the server image on pgsty/silo and use only a tag or digest published on the Silo download page. The upstream Tenant defaults use a MinIO image. Also keep MINIO_UPDATE=off; the inherited in-place updater still targets the upstream MinIO feed and is not a Silo upgrade path.
Important
For Tenants using a MinIO Image older than RELEASE.2024-03-30T09-41-56Z running with AD/LDAP enabled, you must read through the release notes for RELEASE.2024-04-18T19-09-19Z before starting this procedure. You must take the extra steps documented in the linked release as part of the upgrade procedure.
Upgrade a Tenant using Kustomize
The following procedure upgrades a MinIO Tenant using Kustomize and the kubectl CLI. If you deployed the Tenant using Helm, use the Upgrade the Tenant using the MinIO Helm Chart procedure instead.
To upgrade a Tenant with Kustomize:
If the tenant was deployed with Operator Console, there are additional steps to create a base configuration file before upgrading.
If the tenant was deployed with Kustomize, the base configuration is your existing kustomization files from the original tenant deployment.
Choose a tab below depending on how the tenant was deployed:
-
Create the base configuration file:
-
In a convenient directory, save the current Tenant configuration to a file using
kubectl get:Replace
my-tenantandmy-tenant-nswith the name and namespace of the Tenant to upgrade.Edit the file to remove the following lines:
creationTimestamp:resourceVersion:uid:selfLink:(if present)
For example, remove the highlighted lines:
-
In the same directory, create a
kustomization.yamlfile with contents resembling the following:If you used a different filename for the
kubectl getoutput in the previous step, replacemy-tenant-base.yamlwith the name of that file.
-
- You can upgrade the tenant using the
kustomizationfiles from the original deployment as the base configuration. If you no longer have these files, follow the instructions in the Operator Console-Deployed Tenant tab.
- Create a
upgrade-minio-tenant.yamlfile with contents resembling the following:
This file instructs Kustomize to upgrade the tenant using the specified image. The name of this file, upgrade-minio-tenant.yaml, must match the patches.path filename specified in the kustomization.yaml file created in the previous step.
Replace my-tenant and my-tenant-ns with the name and namespace of the Tenant to upgrade. Replace the sample image tag only with a newer published Silo release that you have validated.
Alternatively, you can update the base configuration directly, according to your local procedures. Refer to the Kustomize Documentation for more information.
- From the same directory as the above files, apply the updated configuration to the Tenant with
kubectl apply:
The output resembles the following:
Upgrade the Tenant using the MinIO Helm Chart
This procedure upgrades an existing MinIO Tenant using Helm Charts.
If you deployed the Tenant using Kustomize, use the Upgrade a Tenant using Kustomize procedure instead.
-
Verify the existing Silo Tenant installation.
Use
kubectl get all -n TENANT_NAMESPACEto verify the health and status of all Tenant pods and services.Use the
helm listcommand to view the installed charts in the namespace:The result should resemble the following:
-
Update the Operator Repository
Use
helm repo update minio-operatorto update the MinIO Operator repo. If you set a different alias for the MinIO Operator repository, specify that to the command. You can usehelm repo listto review your installed repositories.Use
helm searchto check the latest available chart version after updating the Operator Repo:The response should resemble the following:
The
minio-operator/minio-operatoris a legacy chart and should not be installed under normal circumstances. -
Preserve and review the Tenant values
Export the release’s current user-supplied values, then verify that the file retains all topology, storage, TLS, credentials, and scheduling settings:
Set
tenant.image.repositorytopgsty/silo, pintenant.image.tagto a tested published Silo release, and ensuretenant.envincludesMINIO_UPDATE=off. Never allow a chart upgrade to silently restore the upstream image default. -
Run the pinned
helm upgradePin the chart version separately from the Silo server image and pass the reviewed values file:
The command results should return success with a bump in the
REVISIONvalue. -
Validate the Tenant Upgrade
Check that all services and pods are online, confirm the running image digest, and perform an authenticated S3 read/write smoke test before completing the rollout.
20 - Deploy Silo on Windows
This page documents deploying Silo onto Microsoft Windows hosts for development and evaluation.
Silo publishes Windows archives for x86-64 and ARM64. The current project CI runs on Linux and does not provide Windows runtime coverage, so the old upstream list of “officially supported” Windows releases has been removed. Validate the exact Windows edition, filesystem, service wrapper, and workload before relying on it in production.
The procedure includes guidance for deploying Single-Node Multi-Drive (SNMD) and Single-Node Single-Drive (SNSD) topologies in support of early development and evaluation environments.
This guide does not validate Multi-Node Multi-Drive (MNMD) distributed configurations on Windows hosts.
Considerations
Review Checklists
Ensure you have reviewed our published Hardware, Software, and Security checklists before attempting this procedure.
Erasure Coding Parity
MinIO automatically determines the default erasure coding configuration for the cluster based on the total number of nodes and drives in the topology. You can configure the per-object parity setting when you set up the cluster or let MinIO select the default (EC:4 for production-grade clusters).
Parity controls the relationship between object availability and storage on disk. Use the MinIO Erasure Code Calculator for guidance in selecting the appropriate erasure code parity level for your cluster.
While you can change erasure parity settings at any time, objects written with a given parity do not automatically update to the new parity settings.
Procedure
1. Download the Silo Binary
Download the Windows archive for your architecture from Download & Install, verify it against the checksum published with the same release, and extract minio.exe.
The next step includes instructions for running the executable. Launch the server from PowerShell or the Command Prompt rather than by double-clicking it in Explorer.
2. Launch the MinIO Server
In PowerShell or the Command Prompt, navigate to the location of the executable or add the path of the minio.exe file to the system $PATH. computer.
For Windows hosts with multiple drives, you can specify a sequential set of drives to use for configuring MinIO in the Single-Node Multi-Drive (SNMD) topology:
The minio server process prints its output to the system console, similar to the following:
The process is tied to the current PowerShell or Command Prompt window. Closing the window stops the server and ends the process.
Use this command to start a local MinIO instance in the C:\minio folder. You can replace C:\minio with another drive or folder path on the local
The minio server process prints its output to the system console, similar to the following:
The process is tied to the current PowerShell or Command Prompt window. Closing the window stops the server and ends the process.
3. Connect your Browser to the MinIO Server
Access the MinIO Console by going to a browser (such as Microsoft Edge) and going to http://127.0.0.1:9001 or one of the Console addresses specified in the minio server command’s output. For example, Console: http://192.0.2.10:9001 http://127.0.0.1:9001 in the example output indicates two possible addresses to use for connecting to the Console.
While port 9000 is used for connecting to the API, MinIO automatically redirects browser access to the MinIO Console.
Log in to the Console with the RootUser and RootPass user credentials displayed in the output. These default to minioadmin | minioadmin.
You can use the MinIO Console for general administration tasks like Identity and Access Management, Metrics and Log Monitoring, or Server Configuration. Each MinIO server includes its own embedded MinIO Console.
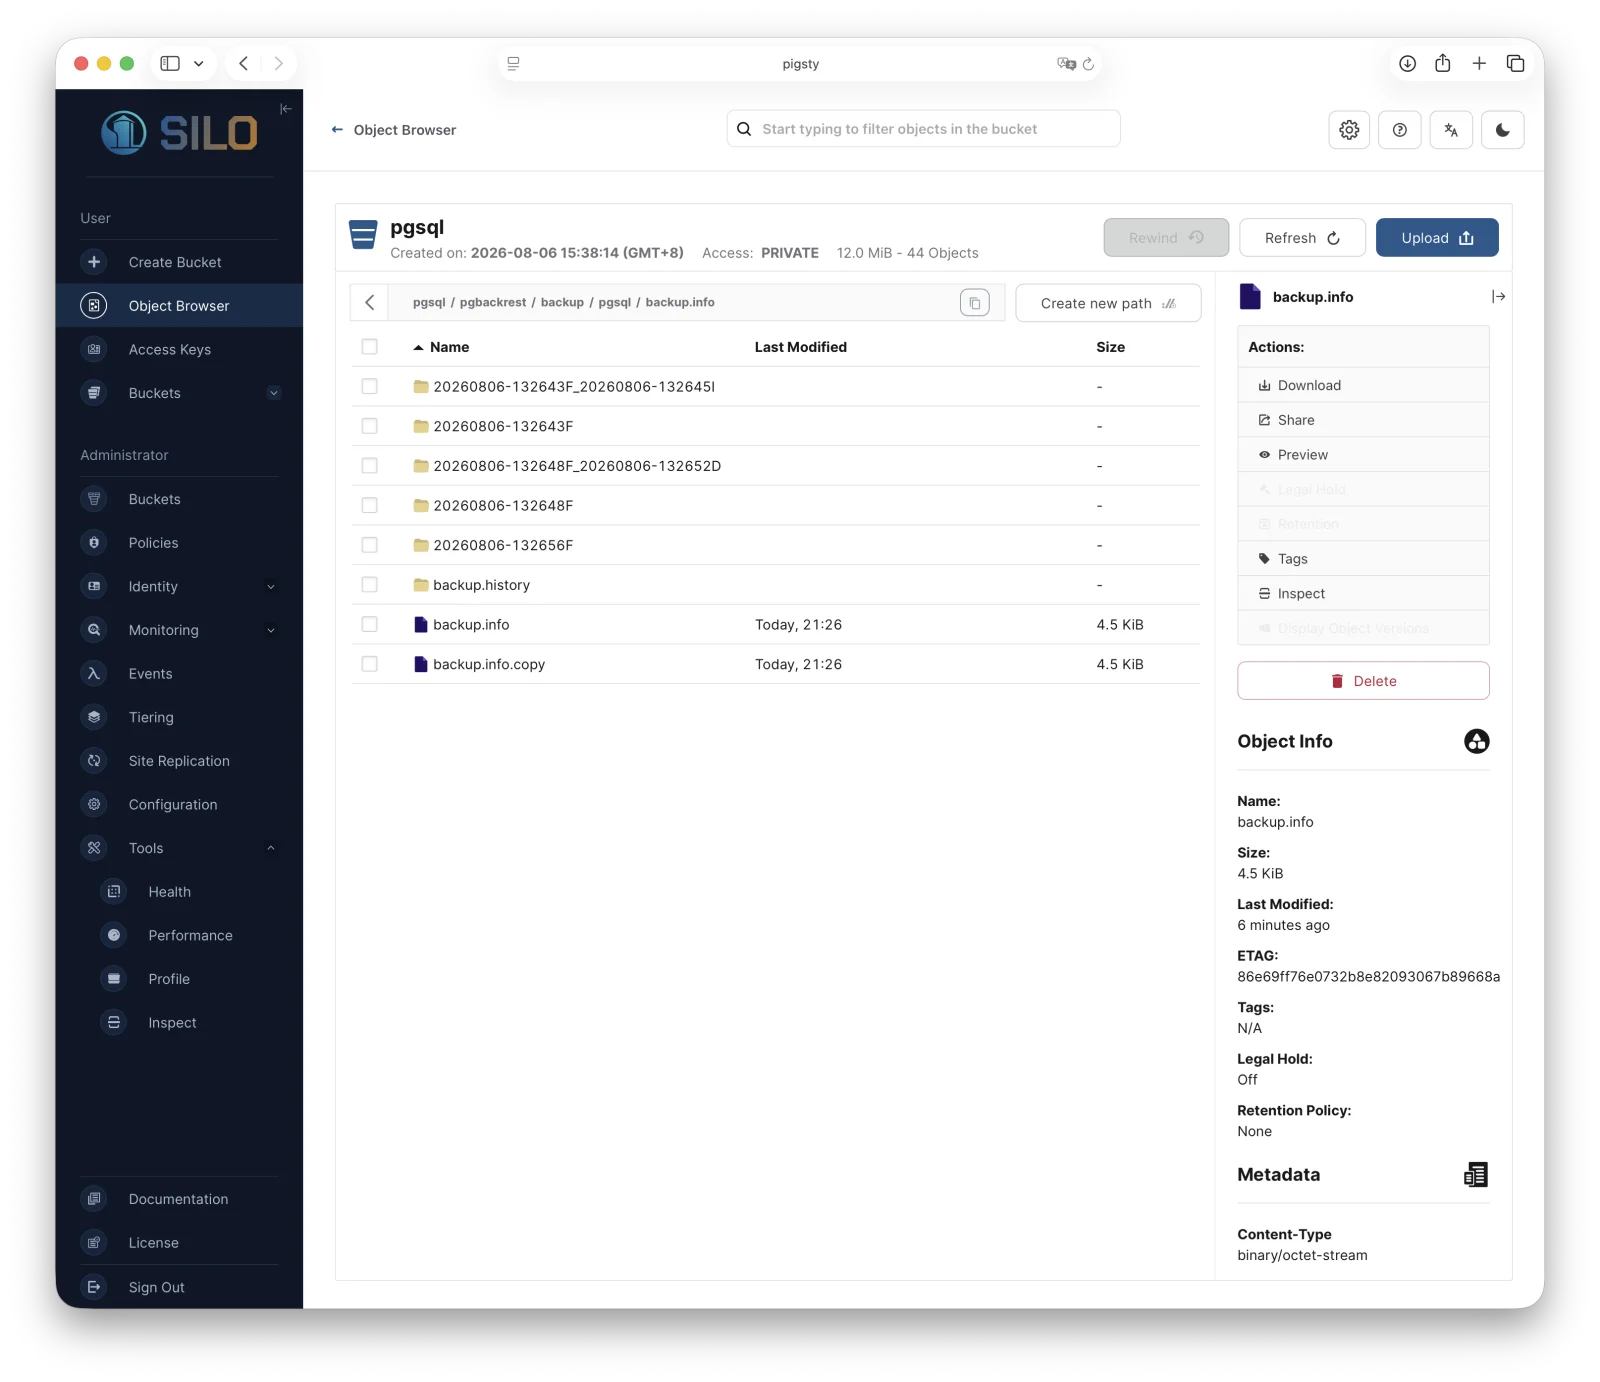
For more information, see the MinIO Console documentation.
4. (Optional) Install the Silo Client
The Silo client allows you to work with the deployment from PowerShell.
Download the Windows client archive from Download & Install, verify its checksum, and extract mcli.exe.
Run it from the Command Prompt or PowerShell:
Use mc alias set through the installed mcli.exe command to authenticate and connect to the deployment.
The mc alias set command takes four arguments:
- The name of the alias
- The hostname or IP address and port of the MinIO server
- The Access Key for a MinIO user
- The Secret Key for a MinIO user
For additional details about this command, see mc alias set.
5. Next Steps
- Enable TLS before exposing the service beyond a trusted development network.
- Replace the example credentials and create least-privilege users through Identity and Access Management.
- Configure monitoring and alerting before relying on the deployment for persistent data.
21 - Expand a Silo Tenant
This procedure documents expanding the available storage capacity of an existing MinIO tenant by deploying an additional pool of MinIO pods in the Kubernetes infrastructure.
Important
The MinIO Operator Console is deprecated and removed in Operator 6.0.0.
See Modify a MinIO Tenant for instructions on migrating Tenants installed via the Operator Console to Kustomization.
Prerequisites
MinIO Kubernetes Operator
This procedure requires a valid installation of the MinIO Kubernetes Operator and assumes the local host has a matching Operator installation. It uses v7.1.1, the final upstream release before the repository was archived, as a frozen compatibility baseline.
See Deploy MinIO on Kubernetes for complete documentation on deploying the MinIO Operator.
Available Worker Nodes
MinIO deploys additional minio server pods as part of the new Tenant pool. The Kubernetes cluster must have sufficient available worker nodes on which to schedule the new pods.
The MinIO Operator provides configurations for controlling pod affinity and anti-affinity to direct scheduling to specific workers.
Persistent Volumes
Exclusive access to drives
MinIO requires exclusive access to the drives or volumes provided for object storage. No other processes, software, scripts, or persons should perform any actions directly on the drives or volumes provided to MinIO or the objects or files MinIO places on them.
Unless directed by MinIO Engineering, do not use scripts or tools to directly modify, delete, or move any of the data shards, parity shards, or metadata files on the provided drives, including from one drive or node to another. Such operations are very likely to result in widespread corruption and data loss beyond MinIO’s ability to heal.
MinIO can use any Kubernetes Persistent Volume (PV) that supports the ReadWriteOnce access mode. MinIO’s consistency guarantees require the exclusive storage access that ReadWriteOnce provides.
For Kubernetes clusters where nodes have Direct Attached Storage, MinIO strongly recommends using the DirectPV CSI driver. DirectPV provides a distributed persistent volume manager that can discover, format, mount, schedule, and monitor drives across Kubernetes nodes. DirectPV addresses the limitations of manually provisioning and monitoring local persistent volumes.
Note
MinIO Tenants on EKS must use the EBS CSI Driver to provision the necessary underlying persistent volumes. MinIO strongly recommends using SSD-backed EBS volumes for best performance. For more information on EBS resources, see EBS Volume Types.
Procedure
The MinIO Operator supports expanding a MinIO Tenant by adding additional pools.
-
Review the Kustomization object which describes the Tenant object (
tenant.yaml).The
spec.poolsarray describes the current pool topology. -
Add a new entry to the
spec.poolsarray.The new pool must reflect your intended combination of Worker nodes, volumes per server, storage class, and affinity/scheduler settings. See MinIO Custom Resource Definition for more complete documentation on Pool-related configuration settings.
-
Apply the updated Tenant configuration
Use the
kubectl applycommand to update the Tenant:Modify the path to the Kustomization directory to match your local configuration.
-
Review the Helm
values.yamlfile.The
tenant.poolsarray describes the current pool topology. -
Add a new entry to the
tenant.poolsarray.The new pool must reflect your intended combination of Worker nodes, volumes per server, storage class, and affinity/scheduler settings. See Tenant Helm Charts for more complete documentation on Pool-related configuration settings.
-
Apply the updated Tenant configuration
Use the
helm upgradecommand to update the Tenant:The command above assumes use of the MinIO Operator Chart repository. If you installed the Chart manually or by using a different repository name, specify that chart or name in the command.
Replace
TENANT-NAMEandTENANT-NAMESPACEwith the name and namespace of the Tenant respectively. You can usehelm list -n TENANT-NAMESPACEto validate the Tenant name.
You can use the kubectl get events -n TENANT-NAMESPACE --watch to monitor the progress of expansion. The MinIO Operator updates services to route connections appropriately across the new nodes. If you use customized services, routes, ingress, or similar Kubernetes network components, you may need to update those components for the new pod hostname ranges.
22 - Migrate from Gateway or Filesystem Mode
Background
The MinIO Gateway and the related filesystem mode entered a feature freeze in July 2020. In February 2022, MinIO announced the deprecation of the MinIO Gateway. Along with the deprecation announcement, MinIO also announced that the feature would be removed in six months time.
As of RELEASE.2022-10-29T06-21-33Z, the MinIO Gateway and the related filesystem mode code have been removed. Deployments still using the standalone or filesystem MinIO modes that upgrade to MinIO Server RELEASE.2022-10-29T06-21-33Z or later receive an error when attempting to start MinIO.
Overview
To upgrade to the RELEASE.2022-10-29T06-21-33Z or later release, those who were using the standalone or filesystem deployment modes must create a new Single-Node Single-Drive deployment and migrate settings and content to the new deployment.
This document outlines the steps required to successfully launch and migrate to a new deployment.
Important
Standalone/file system mode continues to work on any release up to and including MinIO Server RELEASE.2022-10-24T18-35-07Z. To continue using a standalone deployment, install that MinIO Server release with MinIO Client RELEASE.2022-10-29T10-09-23Z or any earlier release with its corresponding MinIO Client. Note that the version of the MinIO Client should be newer and as close as possible to the version of the MinIO server.
Filesystem mode deployments must be on at least RELEASE.2022-06-25T15-50-16Z to use the MinIO Client import and export commands. Filesystem mode deployments up to and including RELEASE.2022-06-20T23-13-45Z can be migrated by manually recreating users, policies, buckets, and other resources on the new deployment.
Procedure
Note
You can set MinIO configuration settings in environment variables and using mc admin config set. Depending on your current deployment setup, you may need to retrieve the values for both.
You can examine any runtime settings using env | grep MINIO_ or, for deployments using MinIO’s systemd service, check the contents of /etc/default/minio.
-
For filesystem mode deployments:
If needed, upgrade the existing deployment.
The oldest acceptable versions are:
- MinIO RELEASE.2022-06-25T15-50-16Z
- MinIO Client RELEASE.2022-06-26T18-51-48Z
The newest acceptable versions are:
- MinIO RELEASE.2022-10-24T18-35-07Z
- MinIO Client RELEASE.2022-10-29T10-09-23Z
-
Create a new Single-Node Single-Drive MinIO deployment.
Follow our installation instructions for your OS of choice and configure the installation as a Single-Node Single-Drive (SNSD) topology.
The location of the deployment can be any empty folder on the storage medium of your choice. A new folder on the same drive can work for the new deployment as long as the existing deployment is not on the root of a drive. If the existing standalone system points to the root of the drive, you must use a separate drive for the new deployment.
If both old and new deployments are on the same host:
-
Install the new deployment to a different path from the existing deployment.
-
Set the new deployment’s Console and API ports to different ports than the existing deployment.
The following commandline options set the ports at startup:
--addressto set the API port.--console-addressto set the Console port.
-
For deployments managed by
systemd:- Duplicate the existing
/etc/default/minioenvironment file with a unique name. - In the new deployment’s service file, update
EnvironmentFileto reference the new environment file.
- Duplicate the existing
The steps below use the
mccommand line tool from both deployments. Existing MinIO Client ismcfrom the old deployment. New MinIO Client ismcfrom the new deployment. -
-
Add an alias for the deployment created in the previous step using
mc alias setand the new MinIO Client.- Use the new MinIO Client.
- Replace
NEWALIASwith the alias to create for the deployment. - Replace
PATHwith the IP address or hostname and port for the new deployment. - Replace
ACCESSKEYandSECRETKEYwith the credentials you used when creating the new deployment.
-
Migrate settings according to the type of deployment:
- The MinIO Gateway is a stateless proxy service that provides S3 API compatibility for an array of backend storage systems.
- Filesystem mode deployments provide an S3 access layer for a single MinIO server process and single storage volume.
Migrate configuration settings:
If your deployment uses environment variables for configuration settings, copy the environment variables from the existing deployment’s
/etc/default/miniofile to the same file in the new deployment. You may omit anyMINIO_CACHE_*andMINIO_GATEWAY_SSEenvironment variables, as these are no longer used.If you use
mc admin config setfor configuration settings, duplicate the existing settings for the new deployment using the new MinIO Client.NoteNote
The following Filesystem mode steps presume the existing MinIO Client supports the needed export commands. If it does not, recreate users, policies, lifecycle rules, and buckets manually on the new deployment using the new MinIO Client.
-
Export the existing deployment’s configurations.
Use the
mc admin config exportcommand with the existing MinIO Client to retrieve the configurations defined for the existing standalone MinIO deployment.- Use the existing MinIO Client.
- Replace
ALIASwith the alias used for the existing standalone deployment you are retrieving values from.
-
Import configurations from the existing standalone deployment to the new deployment with the new MinIO Client.
- Use the new MinIO Client.
- Replace
ALIASwith the alias for the new deployment.
If
importreports an error for a configuration key, comment it out with#at the beginning of the relevant line and try again. When you are finished migrating the deployment, verify the current syntax for the target MinIO Server version and set any needed keys manually usingmc admin config set. -
Restart the server for the new deployment with the new MinIO Client.
- Use the new MinIO Client.
- Replace
ALIASwith the alias for the new deployment.
-
Export bucket metadata from the existing standalone deployment with the existing MinIO Client.
The following command exports bucket metadata from the existing deployment to a
.zipfile.The data includes:
- bucket targets
- lifecycle rules
- notifications
- quotas
- locks
- versioning
The export includes the bucket metadata only. This command does not export objects from the existing deployment.
- Use the existing MinIO Client.
- Replace
ALIASwith the alias for your existing deployment.
This command creates a
cluster-metadata.zipfile with metadata for each bucket. -
Import bucket metadata to the new deployment with the new MinIO Client.
The following command reads the contents of the exported bucket
.zipfile and creates buckets on the new deployment with the same configurations.- Use the new MinIO Client.
- Replace
ALIASwith the alias for the new deployment.
The command creates buckets on the new deployment with the same configurations as provided by the metadata in the .zip file from the existing deployment.
-
Export IAM settings from the existing standalone deployment to new deployment with the existing MinIO Client.
If you are using an external identity and access management provider, recreate those settings in the new deployment along with all associated policies.
Use the following command to export IAM settings from the existing deployment. This command exports:
- Groups and group mappings
- STS users and STS user mappings
- Policies
- Users and user mappings
- Use the existing MinIO Client.
- Replace
ALIASwith the alias for your existing deployment.
This command creates a
ALIAS-iam-info.zipfile with IAM data. -
Import the IAM settings to the new deployment with the new MinIO Client.
Use the exported file to create the IAM setting on the new deployment.
- Use the new MinIO Client.
- Replace
ALIASwith the alias for the new deployment. - Replace the name of the zip file with the name for the existing deployment’s file.
-
Migrate bucket contents with
mc mirror.Use
mc mirrorwith the--preserveand--watchflags on the standalone deployment to move objects to the new SNSD deployment with the existing MinIO Client- Use the existing MinIO Client.
- Replace
SOURCE/BUCKETwith the alias and a bucket for the existing standalone deployment. - Replace
TARGET/BUCKETwith the alias and corresponding bucket for the new deployment.
-
Stop writes to the standalone deployment from any S3 or POSIX client.
-
Wait for
mc mirrorto complete for all buckets for any remaining operations. -
Stop the server for both deployments.
-
Restart the new MinIO deployment with the ports used for the previous standalone deployment.
Ensure you apply all environment variables and runtime configuration settings and validate the behavior of the new deployment.
23 - Delete a Silo Tenant
Prerequisites
MinIO Kubernetes Operator
The procedures on this page require a valid installation of the MinIO Kubernetes Operator and assume the local host has a matching Operator installation. They use v7.1.1, the final upstream release before the repository was archived, as a frozen compatibility baseline.
See Deploy MinIO on Kubernetes for complete documentation on deploying the MinIO Operator.
Tenant Persistent Volume Claims
The delete behavior of each Persistent Volume Claims (PVC) generated by the Tenant depends on the Reclaim Policy of its bound Persistent Volume (PV):
- For
recycleordeletepolicies, the command deletes thePVC. - For
retain, the command retains thePVC.
Warning
Deletion of the underlying PV, whether automatic or manual, results in the loss of any objects stored on the MinIO Tenant.
Perform all due diligence in ensuring the safety of stored data prior to deleting the Tenant.
Procedure
You can delete a Kustomization-installed Tenant by deleting the namespace:
Replace TENANT-NAMESPACE with the name of the namespace to remove.
Important
Ensure you have specified the correct namespace for removal before running the command. Namespace removal occurs at the Kubernetes layer, such that the MinIO Operator cannot interfere with nor undo the operation.
You can delete a Helm-installed namespace by using the helm uninstall command:
The command above assumes use of the MinIO Operator Chart repository. If you installed the Chart manually or by using a different repository name, specify that chart or name in the command.
Replace TENANT-NAME and TENANT-NAMESPACE with the name and namespace of the Tenant respectively. You can use helm list -n TENANT-NAMESPACE to validate the Tenant name.
24 - Upgrade Legacy MinIO Operators
MinIO supports the following upgrade paths for older versions of the MinIO Operator:
| Current Version | Supported Upgrade Target |
|---|---|
| 5.0.15 or later | 7.1.1 |
| 5.0.0 to 5.0.14 | 5.0.15 |
| 4.2.3 to 4.5.7 | 4.5.8 |
| 4.0.0 through 4.2.2 | 4.2.3 |
| 3.X.X | 4.2.2 |
To upgrade from Operator to 7.1.1 from version 4.5.7 or earlier, you must first upgrade to version 4.5.8, then upgrade to 5.0.15. Depending on your current version, you may need to do one or more intermediate upgrades to reach v4.5.8.
After upgrading to 5.0.15, see Upgrade MinIO Operator to upgrade to the latest version.
Upgrade MinIO Operator 4.5.8 and Later to 5.0.15
Prerequisites
This procedure requires the following:
- You have an existing MinIO Operator deployment running 4.5.8 or later
- Your Kubernetes cluster runs 1.21.0 or later
- Your local host has
kubectlinstalled and configured with access to the Kubernetes cluster
This procedure upgrades the MinIO Operator from any 4.5.8 or later release to 5.0.15
Tenant Custom Resource Definition Changes
The following changes apply for Operator v5.0.0 or later:
-
The
.spec.s3field is replaced by the.spec.featuresfield. -
The
.spec.credsSecretfield is replaced by the.spec.configurationfield.The
.spec.credsSecretshould hold all the environment variables for the MinIO deployment that contain sensitive information and should not show in.spec.env. This change impacts the Tenant CRD and only impacts users editing a tenant YAML directly, such as through Helm or Kustomize. -
Both the Log Search API (
.spec.log) and Prometheus (.spec.prometheus) deployments have been removed. However, existing deployments are left running as standalone deployments / statefulsets with no connection to the Tenant CR. Deleting the Tenant CRD does not cascade to the log or Prometheus deployments.WarningImportant
MinIO recommends that you create a yaml file to manage these deployments going forward.
Log Search and Prometheus
The latest releases of Operator remove Log Search and Prometheus from included Operator tools. The following steps back up the existing yaml files, perform some clean up, and provide steps to continue using either or both of these functions.
-
Back up Prometheus and Log Search yaml files.
- Replace
myminiowith the name of the tenant on the operator deployment you are upgrading. - Replace
mynamespacewith the namespace for the tenant on the operator deployment you are upgrading.
Repeat for each tenant.
- Replace
-
Remove
.metadata.ownerReferencesfor all backed up files for all tenants. -
(Optional) To continue using Log Search API and Prometheus, add the following variables to the tenant’s yaml specification file under
.spec.envUse the following command to edit a tenant:
- Replace
<TENANT-NAME>with the name of the tenant to modify. - Replace
<TENANT-NAMESPACE>with the namespace of the tenant you are modifying.
Add the following values under
.spec.envin the file:- Replace
<TENANT_NAME>in thenameorvaluelines with the name of your tenant.
- Replace
Procedure
The following procedure upgrades the MinIO Operator using Kustomize.
For Operator versions 5.0.1 to 5.0.14 installed with the MinIO Kubernetes Plugin, follow the Kustomize instructions below to upgrade to 5.0.15 or later. If you installed the Operator using Helm, use the Upgrade using Helm instructions instead.
-
(Optional) Update each MinIO Tenant to the latest stable MinIO Version.
Upgrading MinIO regularly ensures your Tenants have the latest features and performance improvements. Test upgrades in a lower environment such as a Dev or QA Tenant, before applying to your production Tenants. See Upgrade a MinIO Tenant for a procedure on upgrading MinIO Tenants.
-
Verify the existing Operator installation. Use
kubectl get all -n minio-operatorto verify the health and status of all Operator pods and services.If you installed the Operator to a custom namespace, specify that namespace as
-n <NAMESPACE>.You can verify the currently installed Operator version by retrieving the object specification for an operator pod in the namespace. The following example uses the
jqtool to filter the necessary information fromkubectl:The output resembles the following:
If your local host does not have the
jqutility installed, you can run the first part of the command and locate thespec.containerssection of the output. -
Upgrade Operator with Kustomize
The following command upgrades Operator to version 5.0.15:
In the sample output below,
configuredat the end of the line indicates where a new change was applied from the updated CRD: -
Validate the Operator upgrade
You can check the new Operator version with the same
kubectlcommand used previously:
The following procedure upgrades an existing MinIO Operator Installation using Helm.
If you installed the Operator using Kustomize, use the Upgrade using Kustomize instructions instead.
-
(Optional) Update each MinIO Tenant to the latest stable MinIO Version.
Upgrading MinIO regularly ensures your Tenants have the latest features and performance improvements. Test upgrades in a lower environment such as a Dev or QA Tenant, before applying to your production Tenants. See Upgrade a MinIO Tenant for a procedure on upgrading MinIO Tenants.
-
Verify the existing Operator installation.
Use
kubectl get all -n minio-operatorto verify the health and status of all Operator pods and services.If you installed the Operator to a custom namespace, specify that namespace as
-n <NAMESPACE>.Use the
helm listcommand to view the installed charts in the namespace:The result should resemble the following:
You can also introspect the operator pods directly to determine the installed version. The following example uses the
jqtool to filter the necessary information fromkubectl:The output resembles the following:
If your local host does not have the
jqutility installed, you can run the first part of the command and locate thespec.containerssection of the output. -
Update the Operator Repository
Use
helm repo update minio-operatorto update the MinIO Operator repo. If you set a different alias for the MinIO Operator repository, specify that in the command instead ofminio-operator. You can usehelm repo listto review your installed repositories.Use
helm searchto check the latest available chart version after updating the Operator Repo:The response should resemble the following:
The
minio-operator/minio-operatoris a legacy chart and should not be installed under normal circumstances. -
Run
helm upgradeHelm uses the latest chart to upgrade the MinIO Operator:
If you installed the MinIO Operator to a different namespace, specify that in the
-nargument.If you used a different installation name from
operator, replace the value above with the installation name.The command results should return success with a bump in the
REVISIONvalue. -
Validate the Operator upgrade
You can check the new Operator version with the same
kubectlcommand used previously:
Upgrade MinIO Operator 4.2.3 through 4.5.7 to 4.5.8
Prerequisites
This procedure requires the following:
- You have an existing MinIO Operator deployment running 4.2.3 through 4.5.7
- Your Kubernetes cluster runs 1.19.0 or later
- Your local host has
kubectlinstalled and configured with access to the Kubernetes cluster
Procedure
This procedure upgrades MinIO Operator release 4.2.3 through 4.5.7 to release 4.5.8. You can then upgrade from release 4.5.8 to 5.0.15.
-
(Optional) Update each MinIO Tenant to the latest stable MinIO Version.
Upgrading MinIO regularly ensures your Tenants have the latest features and performance improvements.
Test upgrades in a lower environment such as a Dev or QA Tenant, before applying to your production Tenants.
See Upgrade a MinIO Tenant for a procedure on upgrading MinIO Tenants.
-
Verify the existing Operator installation.
Use
kubectl get all -n minio-operatorto verify the health and status of all Operator pods and services.If you installed the Operator to a custom namespace, specify that namespace as
-n <NAMESPACE>.You can verify the currently installed Operator version by retrieving the object specification for an operator pod in the namespace. The following example uses the
jqtool to filter the necessary information fromkubectl:The output resembles the following:
-
Download the Latest Stable Version of the MinIO Kubernetes Plugin
You can install the MinIO plugin using either the Kubernetes Krew plugin manager or manually by downloading and installing the plugin binary to your local host:
Krew is a
kubectlplugin manager developed by the Kubernetes SIG CLI group. See thekrewinstallation documentation for specific instructions. You can use the Krew plugin for Linux, macOS, and Windows operating systems.You can use Krew to install the MinIO
kubectlplugin using the following commands:If you want to update the MinIO plugin with Krew, use the following command:
You can download the MinIO
kubectlplugin to your local system path. ThekubectlCLI automatically discovers and runs compatible plugins.The following code downloads the most recent version of the MinIO Kubernetes plugin and installs it to the system path:
The
mvcommand above may requiresudoescalation depending on the permissions of the authenticated user.Run the following command to verify installation of the plugin:
The output should display the Operator version as 5.0.14.
You can download the MinIO
kubectlplugin to your local system path. ThekubectlCLI automatically discovers and runs compatible plugins.The following PowerShell command downloads the most recent version of the MinIO Kubernetes plugin and installs it to the system path:
Ensure the path to the plugin folder is included in the Windows PATH.
Run the following command to verify installation of the plugin:
The output should display the Operator version as 5.0.14.
-
Run the initialization command to upgrade the Operator
Use the
kubectl minio initcommand to upgrade the existing MinIO Operator installation -
Validate the Operator upgrade
You can check the Operator version by reviewing the object specification for an Operator Pod using a previous step.
Upgrade MinIO Operator 4.0.0 through 4.2.2 to 4.2.3
Prerequisites
This procedure assumes that:
- You have an existing MinIO Operator deployment running any release from 4.0.0 through 4.2.2
- Your Kubernetes cluster runs 1.19.0 or later
- Your local host has
kubectlinstalled and configured with access to the Kubernetes cluster
Procedure
This procedure covers the necessary steps to upgrade a MinIO Operator deployment running any release from 4.0.0 through 4.2.2 to 4.2.3. You can then perform Upgrade MinIO Operator 5.0.15 to 7.1.1 to complete the upgrade to 7.1.1.
There is no direct upgrade path for 4.0.0 - 4.2.2 installations to 7.1.1.
-
(Optional) Update each MinIO Tenant to the latest stable MinIO Version.
Upgrading MinIO regularly ensures your Tenants have the latest features and performance improvements. Test upgrades in a lower environment such as a Dev or QA Tenant, before applying to your production Tenants.
See Upgrade a MinIO Tenant for a procedure on upgrading MinIO Tenants.
-
Check the Security Context for each Tenant Pool
Use the following command to validate the specification for each managed MinIO Tenant:
If the
spec.pools.securityContextfield does not exist for a Tenant, the tenant pods likely run as root.As part of the 4.2.3 and later series, pods run with a limited permission set enforced as part of the Operator upgrade. However, Tenants running pods as root may fail to start due to the security context mismatch. You can set an explicit Security Context that allows pods to run as root for those Tenants:
You can use the following command to edit the tenant and apply the changes:
See Pod Security Standards for more information on Kubernetes Security Contexts.
-
Upgrade to Operator 4.2.3
Download the MinIO Kubernetes Plugin 4.2.3 and use it to upgrade the Operator. Open https://github.com/minio/operator/releases/tag/v4.2.3 in a browser and download the binary that corresponds to your local host OS.
For example, Linux hosts running an Intel or AMD processor can run the following commands:
-
Validate all Tenants and Operator pods
Check the Operator and MinIO Tenant namespaces to ensure all pods and services started successfully.
For example:
-
Upgrade to 7.1.1
Follow the Upgrade MinIO Operator 5.0.15 to 7.1.1 procedure to upgrade to
v7.1.1, the final upstream release before the repository was archived.
Upgrade MinIO Operator 3.0.0 through 3.0.29 to 4.2.2
Prerequisites
This procedure assumes that:
- You have an existing MinIO Operator deployment running 3.X.X
- Your Kubernetes cluster runs 1.19.0 or later
- Your local host has
kubectlinstalled and configured with access to the Kubernetes cluster
Procedure
This procedure covers the necessary steps to upgrade a MinIO Operator deployment running any release from 3.0.0 through 3.2.9 to 4.2.2. You can then perform Upgrade MinIO Operator 4.0.0 through 4.2.2 to 4.2.3, followed by Upgrade MinIO Operator 5.0.15 to 7.1.1.
There is no direct upgrade path from a 3.X.X series installation to 7.1.1.
-
(Optional) Update each MinIO Tenant to the latest stable MinIO Version.
Upgrading MinIO regularly ensures your Tenants have the latest features and performance improvements.
Test upgrades in a lower environment such as a Dev or QA Tenant, before applying to your production Tenants.
See Upgrade a MinIO Tenant for a procedure on upgrading MinIO Tenants.
-
Validate the Tenant
tenant.spec.zonesvaluesUse the following command to validate the specification for each managed MinIO Tenant:
- Ensure each
tenant.spec.zoneselement has anamefield set to the name for that zone. Each zone must have a unique name for that Tenant, such aszone-0andzone-1for the first and second zones respectively. - Ensure each
tenant.spec.zoneshas an explicitsecurityContextdescribing the permission set with which pods run in the cluster.
The following example tenant YAML fragment sets the specified fields:
You can use the following command to edit the tenant and apply the changes:
- Ensure each
-
Upgrade to Operator 4.2.2
Download the MinIO Kubernetes Plugin 4.2.2 and use it to upgrade the Operator. Open https://github.com/minio/operator/releases/tag/v4.2.2 in a browser and download the binary that corresponds to your local host OS. For example, Linux hosts running an Intel or AMD processor can run the following commands:
-
Validate all Tenants and Operator pods
Check the Operator and MinIO Tenant namespaces to ensure all pods and services started successfully.
For example:
-
Upgrade to 4.2.3
Follow the Upgrade MinIO Operator 4.0.0 through 4.2.2 to 4.2.3 procedure to upgrade to Operator 4.2.3. You can then upgrade to 7.1.1.